Telephone: 408-839-5569
Email: (Click Here) Andrew@JaguarSpecialties.com
Last Update 7-2-24
XJSC- 5.7 LT1/6 speed Conversion
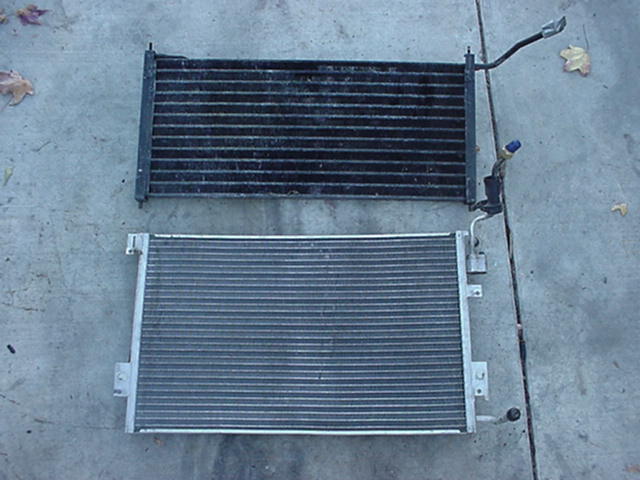
Part 1 Part 5, December, 2005 Air Conditioning System Air conditioning set-ups for V8 conversion Jaguars have always been fairly straightforward, as the cars run a GM compressor from the factory. The AC hook-up on the conversion engine is usually just a matter if fabricating new suction and discharge hoses (with crimped-on, in-line, high and low pressure charge fittings) to fit the new compressor location in the engine bay. The stock AC condenser, stock style receiver/drier, and the remainder of the components remain the same. From there the system is recharged (R12 or R134A) and it works roughly as well as when the car was stock. In a previous installment, I covered the cooling system installation which utilized a stock Camaro LT1 radiator and cooling fans/shroud assembly. Those pieces all clipped together nicely and fit the XJSC like they were made for it. On the XJSC (and all V12 XJS and XJ12 cars), the original engine installation included a large engine oil cooler mounted underneath the stock AC condenser. With the new V8 conversion, this cooler is not needed, and is usually discarded. As a result, additional space is now available for a larger AC condenser, and the OE unit Camaro fits perfectly. It mounts to the front of the stock Camaro radiator via clips molded into the radiator’s left and right tanks. It’s very clean and very simple. But the best part of using this condenser is it is actually 25% or so larger than the OE Jag unit, and as result should provide additional cooling (condensing) capacity for the R134a refrigerant. Here is a photo to compare the OE XJS and Camaro condenser sizes:
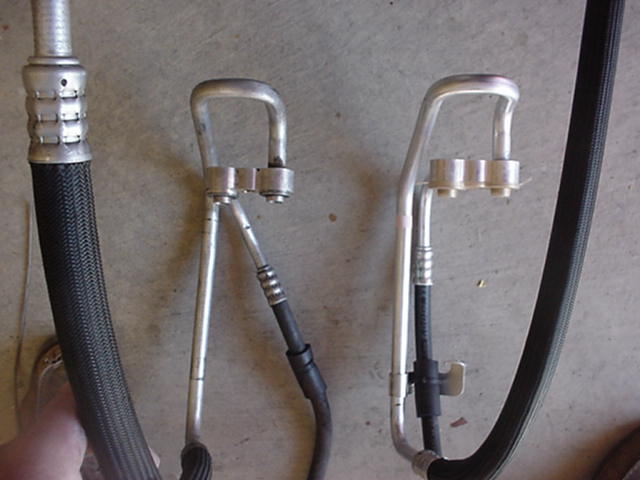
Since the engine compartments of the XJS and Camaro are roughly the same size, and since I planned to use a stock Camaro LT1 AC compressor, I had a feeling I could also utilize many more of the stock Camaro AC components, and as a result simplify the AC installation in this conversion. And as it turns out, nearly every AC component from the Camaro engine compartment could be reused, and most with minimal modifications. Here’s a summary of the key components and how they were installed: AC condenser- Stock Camaro 93-97 unit mounted on front of OE Camaro LT1 radiator. No changes/modifications required AC compressor hose assembly (suction and discharge)- Original Camaro unit-93-97; GM AC hose assemblies are very nice with clean crimps, and in this case, since they are from a 90’s model car, the hoses are compatible with R134a. They are also very inexpensive (~$50-60 new), costing far less than it would cost to make them from scratch. In this installation, only 2 minor modification were required to use the hose assembly in the Jag: A) The discharge pipe direction (as it runs under the compressor) was altered (bent) by about 25-30 degrees to allow easy connection to the AC condenser. The photo here shows top views of a stock hose assembly on the right, and the modified hose assembly on the left:
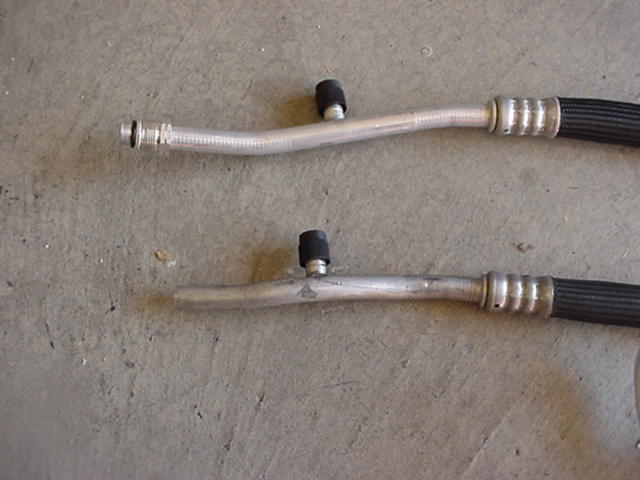
B) The threaded suction fitting (that would have originally connected to the GM accumulator/drier) is cut off with a tubing cutter. Here is a photo of that change:
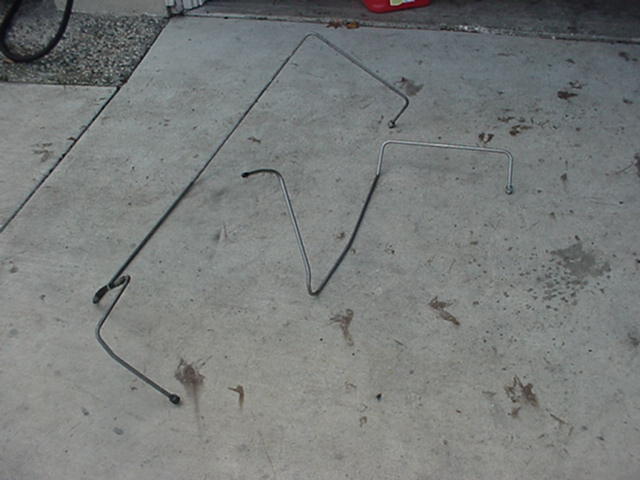
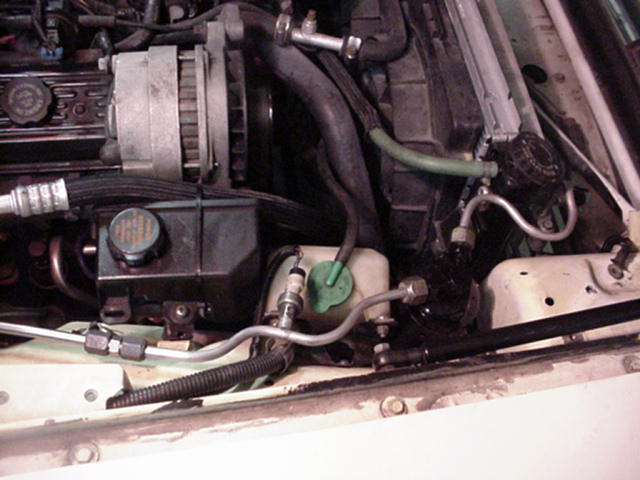
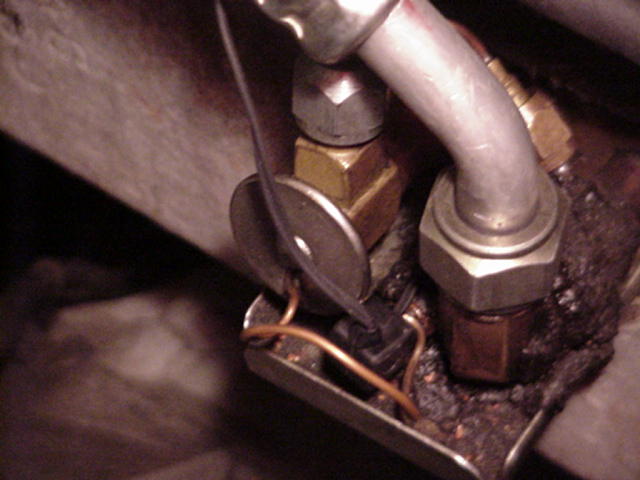
AC Liquid line and receiver/drier- The original Jaguar XJS liquid line (which runs from the expansion valve on the fire wall, up the right side of the engine compartment, and to the front mounted AC drier unit) is constructed (primarily) of 3/8 stainless steel tubing with a short section of hose near the front. This arrangement put the drier unit up in front of the radiator, a location I have never liked on Jags in general (hard to service, etc.,.). The original Camaro installation puts the AC drier on the right/front of the engine compartment, tucked neatly out of way. The Camaro drier is also a smaller, more convenient shape to package (about the size of a soda can), and is mounted with either a simple homemade bracket or a modified OE Camaro bracket. The original Camaro connections to and from the drier are made with 3/8” aluminum tubing, and these sections can be easily modified (bent, by hand) as needed to fit the Jag installation. The section that runs from the condenser to the drier is reformed (bent), as is the section that runs after the drier. All that is required then is to join the original Jag (stainless) line to the aluminum Camaro tubing after the drier. A threaded fitting is removed from the aluminum tube end, the stainless section is shortened (with a tubing cutter) and reformed (by hand), and then the aluminum and stainless tubes are joined with a 3/8” stainless compression fitting-simple. The final unit looks very clean and fits perfectly. The first photo below shows the stock (left) and modified (right) OE XJS stainless liquid lines, and the second photo shows the slightly modified OE Camaro aluminum tube sections leading from the condenser to the drier and then joining the Jag tubing (radiator header plate removed for viewing). Note the OE GM high pressure switch in line on the aluminum tubing (lower middle of photo), and the compression union joint (lower left of photo)
Suction Jumper Hose- The beauty of this whole "OE Camaro" approach is that it requires only one new (fabricated) hose, with only 2 crimps, to complete the installation. This hose is what I call the “suction jumper” and it runs from the expansion valve to the suction side of the Camaro hose assembly. As mentioned above, the suction end of the Camaro hose assembly was modified by removing a threaded fitting, leaving just plain aluminum tubing. The jumper hose is made from #10 AC hose, has a female 5/8”, 45 degree crimp fitting on one end, and has a compression AC hose fitting on the other. This last fitting is crimped onto the #10 hose like any other AC fitting, but has a 5/8” compression section as well so it can be attached to raw tubing. It’s a simple easy fit. This photo shows the suction jumper connected to the modified suction line of the hose assembly.
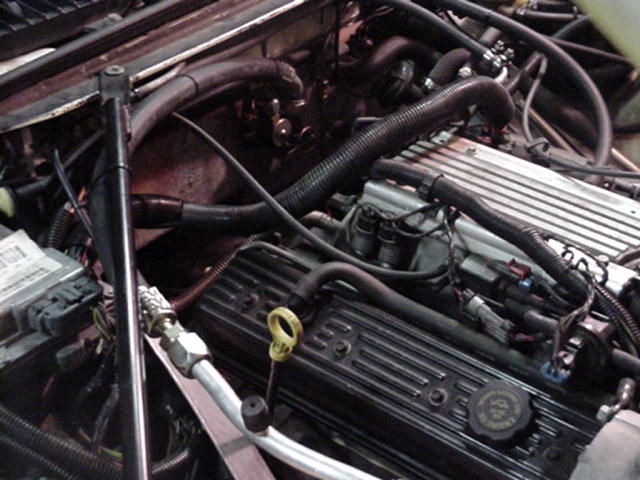
Charge Fittings, high and low pressure- By utilizing the Camaro AC components, no additional in-line charge fittings are required to be added. The low pressure fitting is on the Camaro hose assembly, mounted in the aluminum tubing section near where the jumper hose is joined to it, and the high pressure fitting is on the aluminum tube section that connects directly to the right side of the AC condenser. Both fittings are up high for easy access (just as they were on the Camaro). Additional Notes-sensors- A bonus that came with this approach is that the stock GM high/low pressure switch (that the GM PCM uses to check pressures in the system and engage/disengage the AC compressor) is retained in the aluminum tubing between the drier and liquid line compression joint. The PCM can then monitor high side pressures and shut down the compressor if they fall out of acceptable ranges. All stock LT1 wiring harnesses have this connector, and all that was required to utilize this switch in my installation was to slightly length the connector leads. The GM PCM also utilizes an evaporator temperature sensor. This sensor monitors the temperature of the evaporator core and allows the PCM to shut off the compressor if the core begins to freeze. I just plugged this sensor into the gooey goo on the cold side of the OE XJS expansion valve and that was it. Here’s a close up of the sensor attached to the expansion valve:
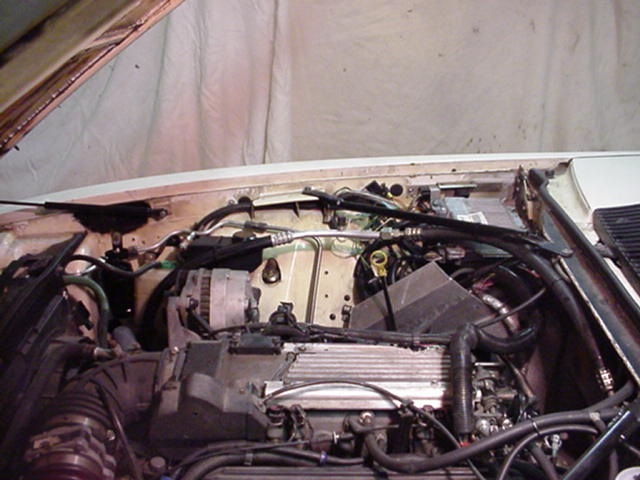
Completed Installation- This final photo shows the completed installation. As you can see, this approach greatly simplified the AC installation on this conversion, and also kept overall costs down as well. What I especially like about this system is the number of crimps (fittings to hoses) is minimized, so the likelihood of leaks is reduced. After tightening all fittings and evacuating, the system was charged up and seems to work just fine. I encourage any readers doing LT1 conversions to consider this approach as opposed to fabricating all new hoses for the system. The methods here could also be adapted to XJ6 sedans as well. For anyone who is interested, I can provide parts for this AC scheme (i.e., suction jumper hose, etc.,.)- please Email me for more info.
|