Telephone: 408-839-5569
Email: (Click Here) Andrew@JaguarSpecialties.com
Last Update 7-2-24
XJSC- 5.7 LT1/6 speed Conversion
Part 1
Part 5
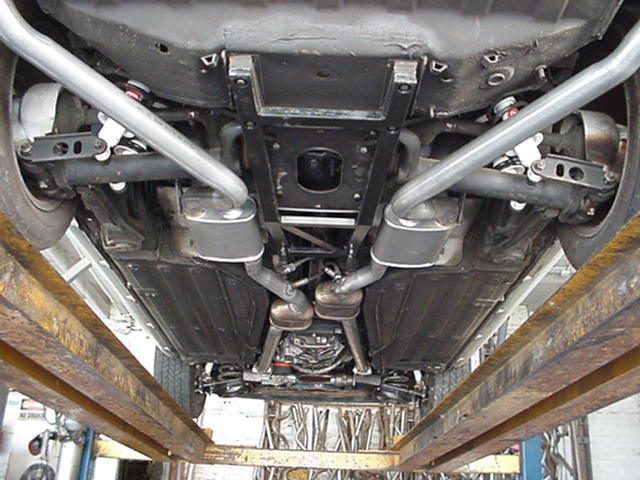
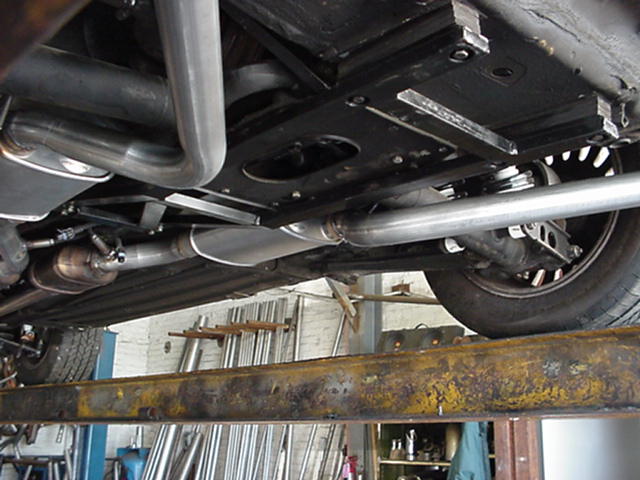
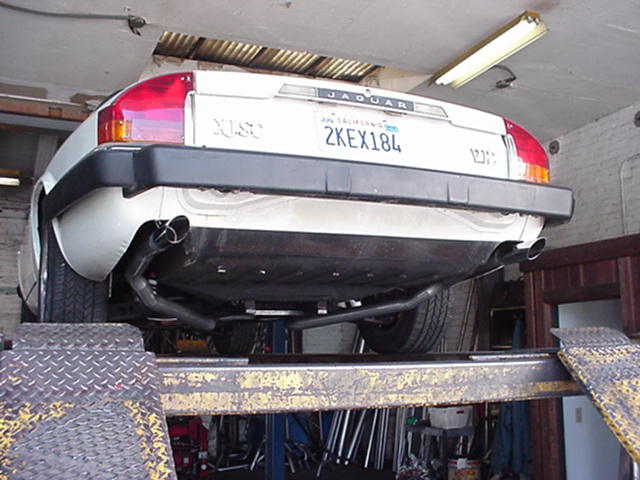
Part 4, Exhaust System With the car finally running and possible to be moved around, it was time to turn to doing the exhaust system. My general plan was to follow the OE style exhaust configuration of the Camaro SS donor car (this is required for California emissions). Additionally, because this is an emission controlled car, and OBDII too (the engine is from a ‘97 Camaro), I’m required to abide by ‘97 emissions rules to be legal in California. That means the car has to be tested and certified as a ‘97 Camaro. I reused the original (2) catalytic converters that came with the 97 engine, (Note: At the time of my exhaust work, there were virtually no aftermarket OBDII cats certified and approved for use in California, so using OEM cats was my only choice. Since then, some new cats have come onto the market and are OBDII legal for California). On this car, I wanted to try for a more free flowing exhaust then the other conversions I’d done- the previous cars routed the tailpipes through the rear suspension with it’s inherently restrictive design. The plan here was use the twin cats, 2 Ľ” size pipe, a pair of Dynomax mini-turbo mufflers (about the same size as the stock Jaguar mid-mufflers, but much more free flowing), go under the diff, and then out the rear with straight pipe and no resonators. While going under the diff is nothing new for high performance Jag exhausts, the XJSC adds an extra wrinkle here in that the factory installs extra bracing under the the center of the rear suspension to stiffen the car. As a result, the pipes actually go on either side of the diff, just beneath the A-arm inner pivot point. Also, to save space, the cat locations (fore/aft) were staggered to make for a narrower overall package. No crossover was used (yet), as I’m not sure if it is allowed (the OBDII cars use 4 oxygen sensors- 2 in front and 2 behind the cats. A crossover behind the cats might tend to mix the exhaust flows, which may not be legal for emissions-the inspector will have to advise on that- more later). Some simple chrome tips complete the package and make it subtle. The attached next few photos show some details of the exhaust- an overall view of the system, under-axle pipe routing, and the rear tips.
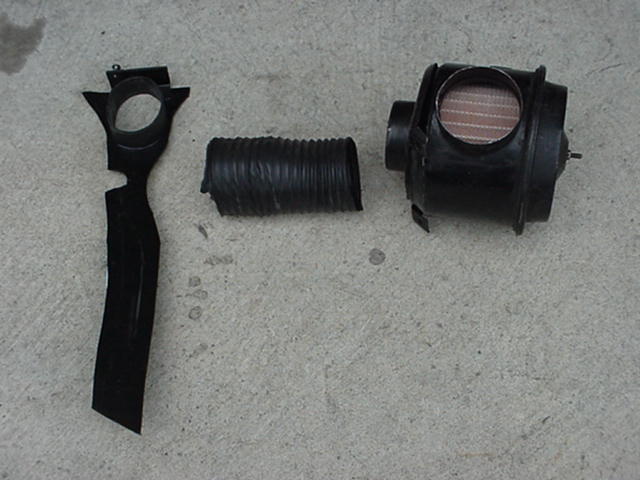
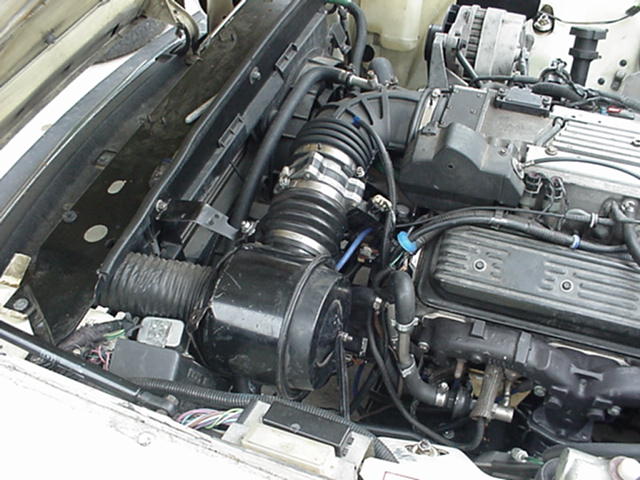
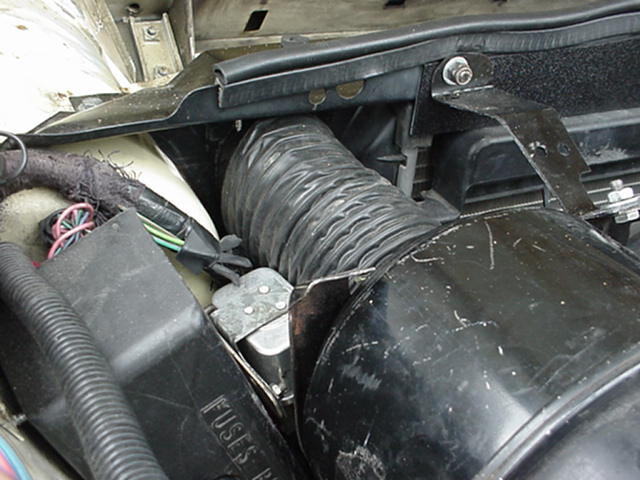
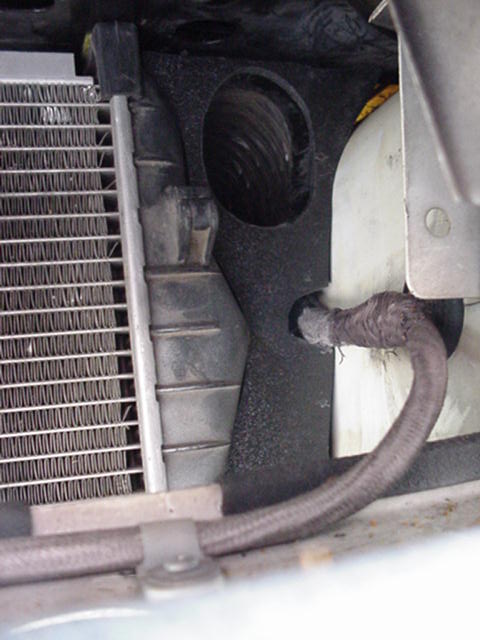
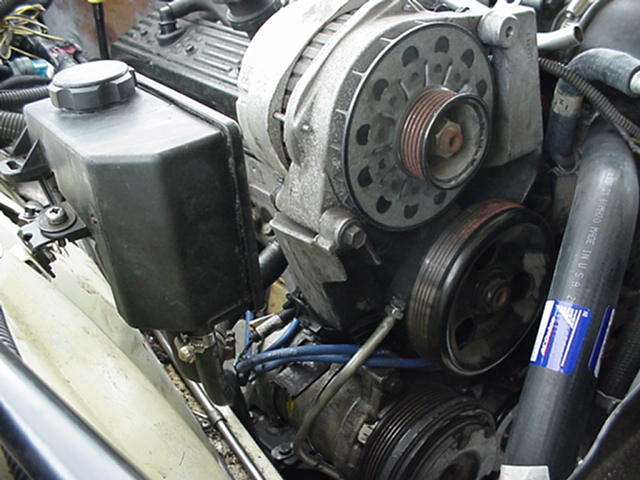
Well, the real question really is “how does it sound” and the answer is fabulous!! The car has a very throaty growl, but is not louder than a stock Camaro (well maybe a little). My first drive in the car after the exhaust was done confirmed that the interior is still as quiet as any other V8 Jag I’ve driven, so this combo seems ok for now. When I go back in later (after emissions certification and performance base lining) to install a set of my headers, I’ll have the exhaust redone in perhaps larger pipe and even Flowmaster mufflers to see what benefits can be gained form even more flow. Air Cleaner Installation I wanted to bring only cool air to the intake, and that meant feeding the engine from outside. I planned ahead for this type of air cleaner scheme by mounting the radiator as far to the right as possible. This would allow a wide gap on the left side of the radiator for fresh air induction, and easy routing into the (left side) air intake of the LT1. This stock GM unit allowed for simple installation into the XJSC- the can is rotated 90 degrees so the intake (originally facing down), now pointed forward towards the previously mentioned gap beside the radiator, and the outlet fed to the right, towards the LT1 mass air flow sensor. The can lid is at the rear, so the filter can be easily changed. Two simple brackets hold it in place (using existing holes in the engine compartment and radiator header for attachment). The air cleaner itself was not modified for this installation-it is completely stock. In front of the air cleaner, I mounted a simple 1/8” ABS plate to fill in the gap (between the left side of the radiator and the left side of the engine compartment), and opened a 3” hole in it for the fresh air feed. A common 3” flexible vinyl ducting feeds fresh air directly into the air cleaner input. It’s a simple clean installation. One other reason here for me to go with an OE style air cleaner is that this car has to go through California emissions inspection and certification. One other note- the stock Camaro/Firebird and Caprice/Impala rubber intake elbow (from the MAF to the throttle body) includes a special opening to attach a resonance duct. This resonance duct is basically a dead leg container (open only at one end) that is designed to muffle intake noise. On the Camaro/Firebird it is a long slim plastic tube hanging in front of the engine; on the Caprice/Impala it is a large plastic triangular unit above the intake plenum. Either unit is a flow restriction, but GM offers a factory elbow prepared for the race teams that eliminates that unit. Opting for a few free HP, I installed one on this car as well- it fits just like the original duct and is smog legal too. The attached few photos show the air cleaner installation and parts- the can itself, inlet ducting and radiator side plate (with fresh air opening); completed installation, and a view from the front and to the left of the radiator to show the air inlet opening . It looks factory installed and is nice and quiet.
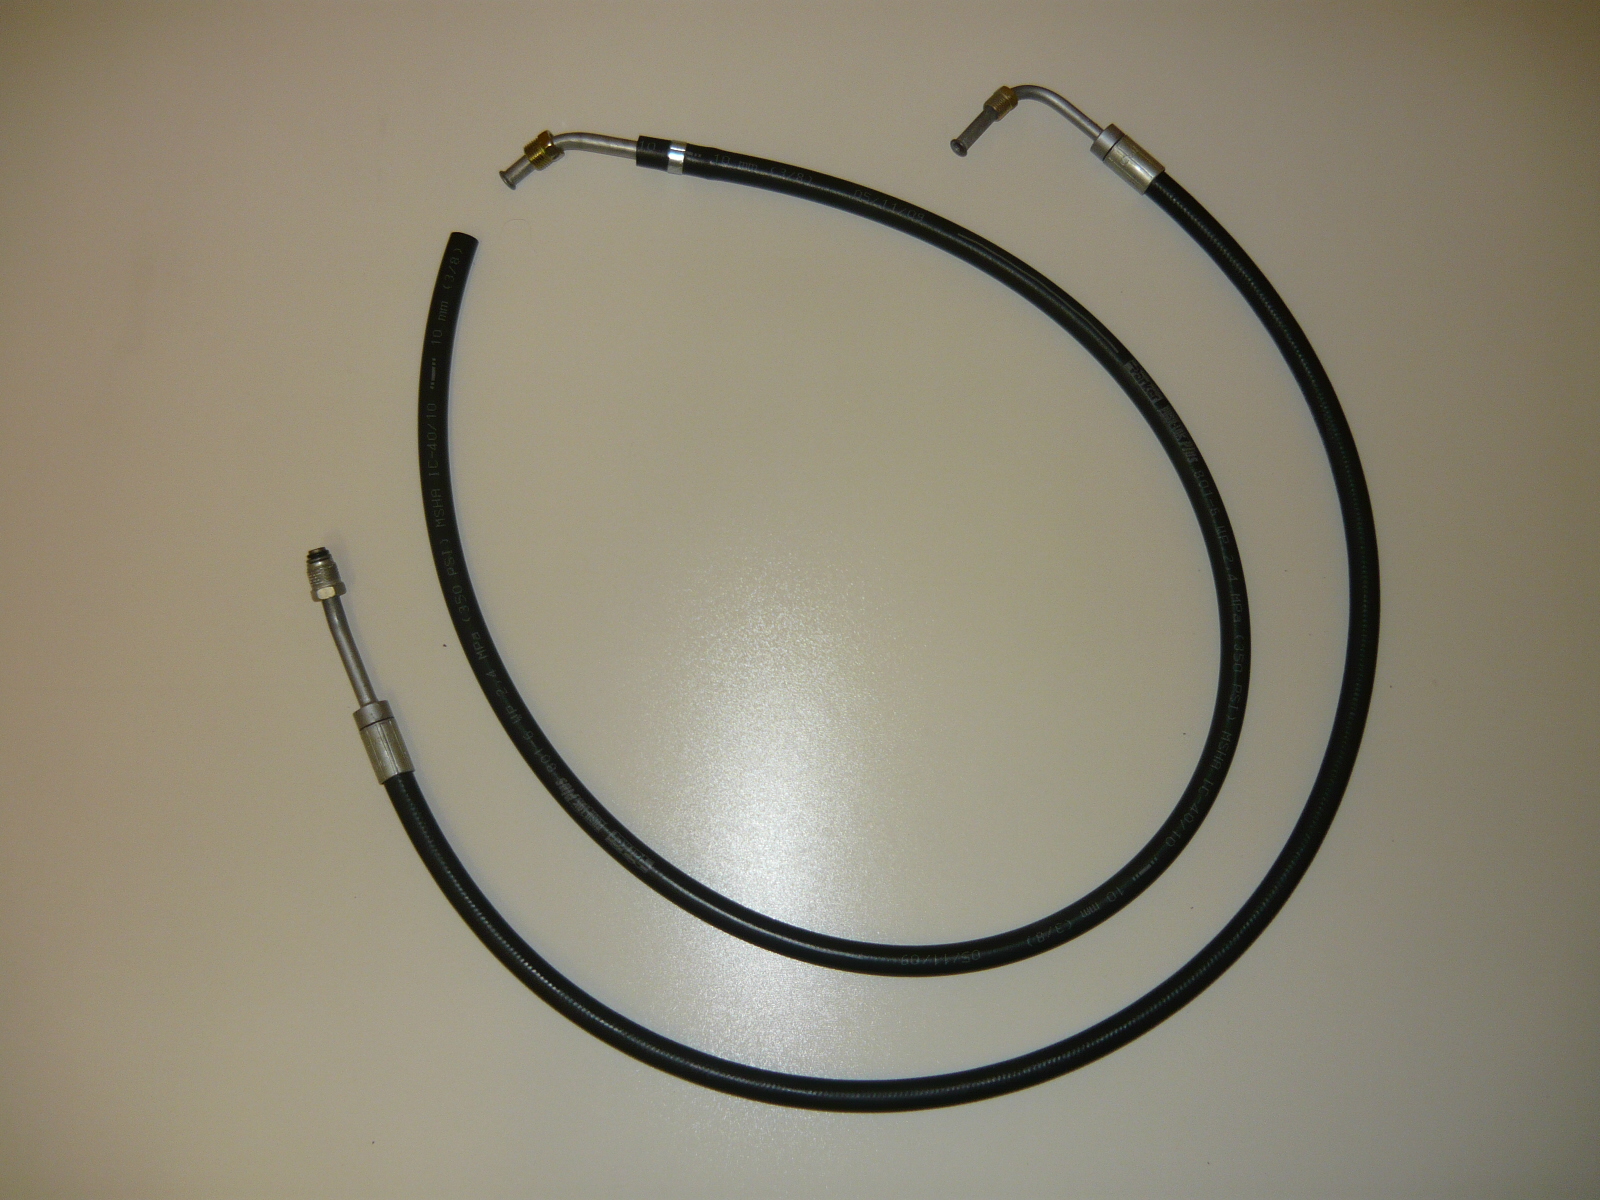
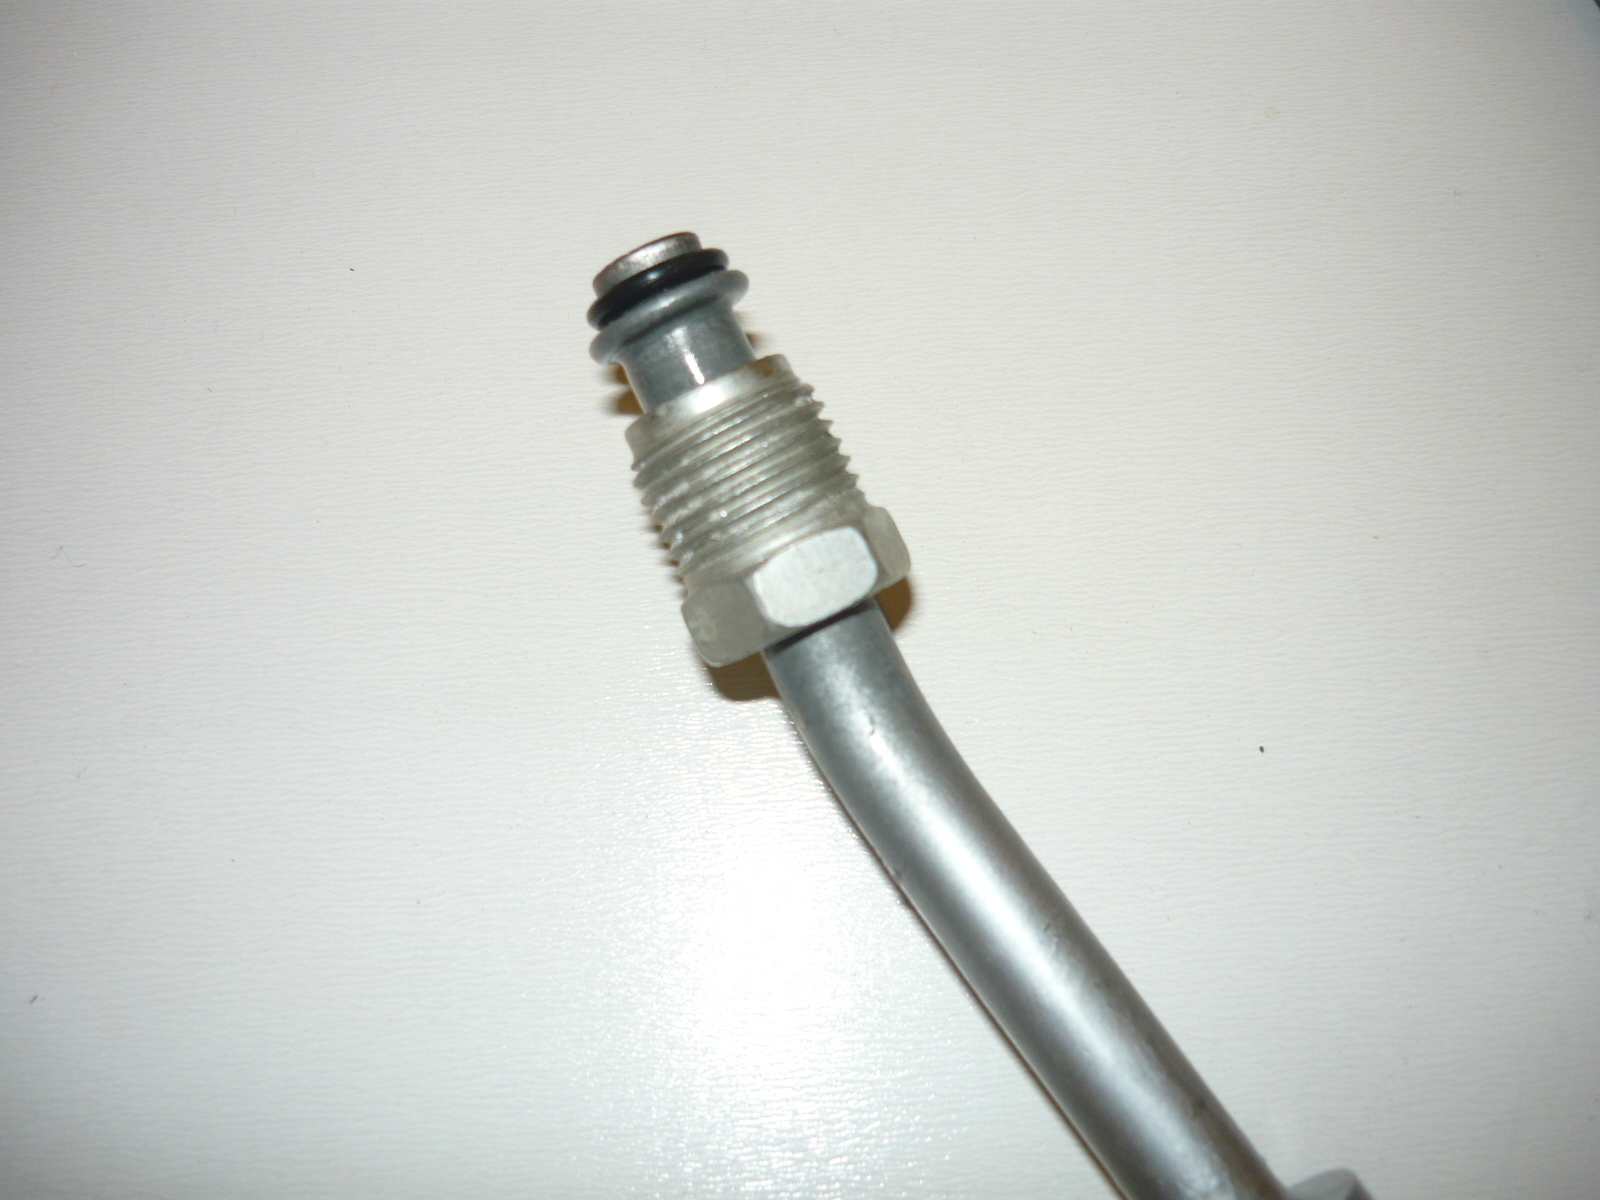
Power Steering The power steering setup was the simplest part of the conversion. The LT1 system uses a remote reservoir for the fluid, so the only question was where to mount it. The power steering hoses themselves were made by combining the original Jaguar style ends (at the rack) with the Camaro style ends- (at the pump and reservoir). The high pressure line retains a short of steel section at the pump, and then is high pressure hose all the way to the rack. This worked very well and these prototype hoses became the model for the Jaguar-LT1 power steering hose sets we now offer to customers for their conversions. Attached are photos of the production version hoses overall, the pump end of the high pressure hose (with its leak-free O-ring style fitting), and the reservoir mounting.
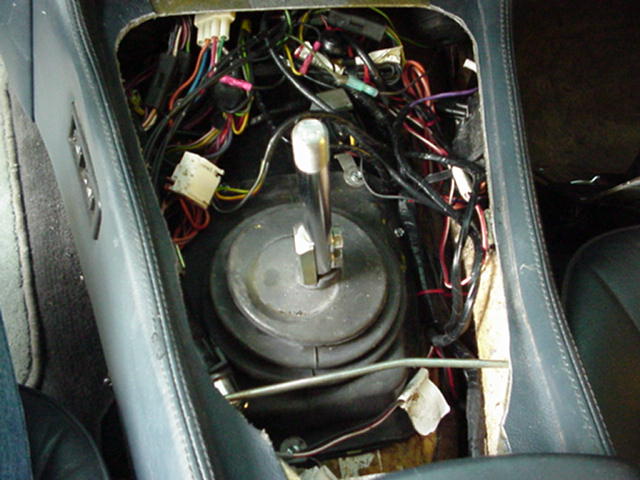
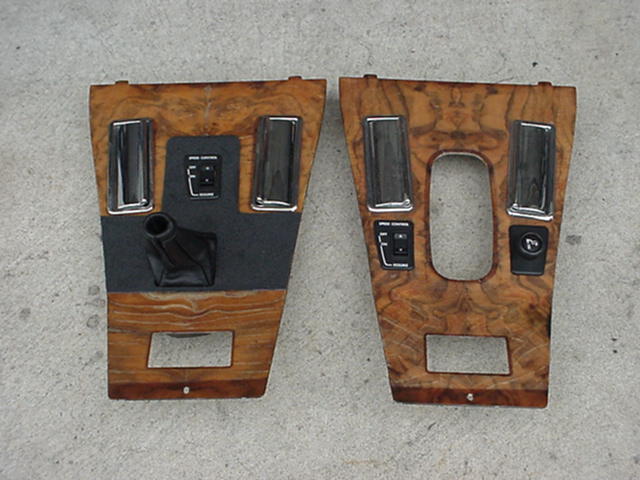
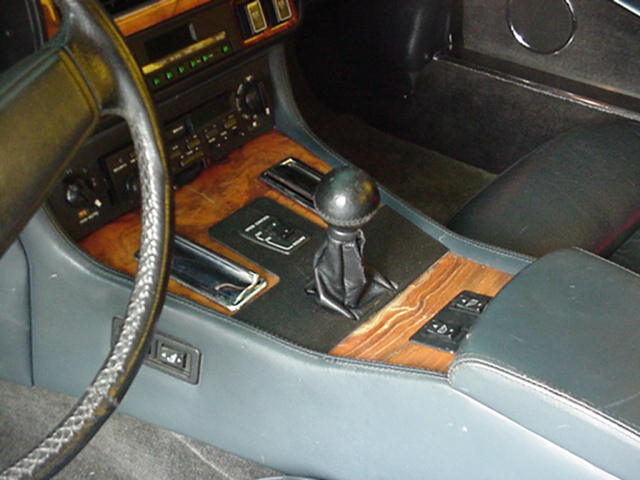
Shifter/Ski Slope Modifications In a previous installment, I mentioned that the transmission shifter position was roughly in the same location as the stock automatic shifter. It actually sits just rearward of the original opening, and some minor modifications to the trans tunnel hole made for a perfect fit (shown in a previous installment). The stock Camaro rubber shifter boot was easily attached to the Jag tunnel, and looked as if it belonged there. On top, the console ski slope was slightly modified with a new hole for the new shifter. A T-shaped piece of 1/8” black ABS sheet was cut to cover the old shifter hole, and surround the new one. It also serves as a mounting for a generic black leather shift boot. The ABS is glued onto the modified ski slope, and the only other modifications are to relocate the cruise control switch (to front and center), and open a hold for the cigarette lighter socket. The window switches and ashtrays remain in their stock locations. A generic black leather shift boot fills the new shifter hole and adds a nice finished touch. The attached photos show the finished trans tunnel installation, the modified ski slope as compared to a stock unit, and the completed console installation. (The ski slope in the test fit was a very used piece-weathered wood, etc.,;a more suitable piece will be installed later. On the shifter side, a custom machined “shorty” version was purchased on EBay Motors.)
First Drive- Finally And now the moment of truth- the first drive. I finally got a chance to take the car out for a big spin around the block and for a few miles, and just one word sums it up-SCARY! To be honest, it’s been a while since I drove a manual trans car, and of course never a V8 Jag. The power and throttle response are fantastic, but what is really surprising is the torque. Even though this XJSC still has the original 2.88 rearend ratio, the motor seems to have more than adequate “umph” to pull it along in any gear. I had planned to swap the 2.88 for a specially built 3.54 posi Jag rear waiting in the garage, but that may not be necessary. I kept all of my first driving to just under 60 mph (city streets…) and haven’t hit the freeway yet to test out the 6th gear (.50 overdrive ratio) and 2.88 combination, but that should be interesting. I’m wondering how well the LT1 will pull the car on freeway grades with that steep of an overdrive/rearend combo. My other impressions were that the front end feels lighter than my other converted XJS’s (likely due to the LT1’s aluminum heads that save at least 50 lbs, perhaps more), but the steering still has good feel. That weight savings did result in something of a nose-high attitude, so some minor tweaking of the stock XJ6 Series 3 front springs I used will be required. The cooling system worked fine with the fans staying off nearly all of the time while driving (those aluminum/plastic radiators are very efficient). The clutch and shifting seem to work fine (I just have to get my clumsy left foot back into the habit doing something besides holding down the carpet). One interesting note is related to engine and trans mounts- on this car I tried a set aftermarket polyurethane mounts rather than the typical OE rubber style. I did have some concern that they would be too firm and transmit too much vibration back into the car, but that doesn’t seem to be the case at all. The vibration levels seem to be similar to a rubber mounted drivetrain, so all seems ok for now. Future project- Air Conditioning installation As with any newly built car, there are a ton of little things to attend to as part of finishing. One of those things is the air conditioning hookup. Typically in these conversions, we mate the stock Jag AC system (drier, condenser, evaporator, etc.,.) with the new GM compressor and custom-made hoses. On an XJS or XJ6, this approach works fine, but these Jags could always use a little boost in the capacity of the AC. The OE XJSC (and all XJS) AC condenser is designed to mount in front of the radiator, and sit on top of the original V12 oil cooler. When a typical XJS is converted to V8, the oil cooler is discarded, thus freeing up space for a larger (taller) condenser. A larger condenser will truly help the Jag system along, not to mention one designed originally to use R134 rather than Jag unit originally sized for use with R12. The stock Camaro radiator that I used has molded in mounting points for the Camaro AC condensor in front of it, so this time I’ll try a stock Camaro AC condenser as well. That will simplify condenser mounting, and also likely allow me to use a (primarily) stock Camaro AC hose package. This approach will eliminate the clumsy OE Jag AC drier in front of the radiator, and switch to a GM canister-style drier in the engine compartment. Some mating/matching/mixing of fittings will likely be required, but the proposition of improved AC operation is more than worth it. The other benefit is that a replacement Camaro AC condenser (should it ever be needed) is only $89 brand new as opposed to several hundred for a Jag unit. I’ll have the results of that little project in the next installment. |