Telephone: 408-839-5569
Email: (Click Here) Andrew@JaguarSpecialties.com
Last Update 7-2-24
XJSC- 5.7 LT1/6 speed Conversion
Part 5
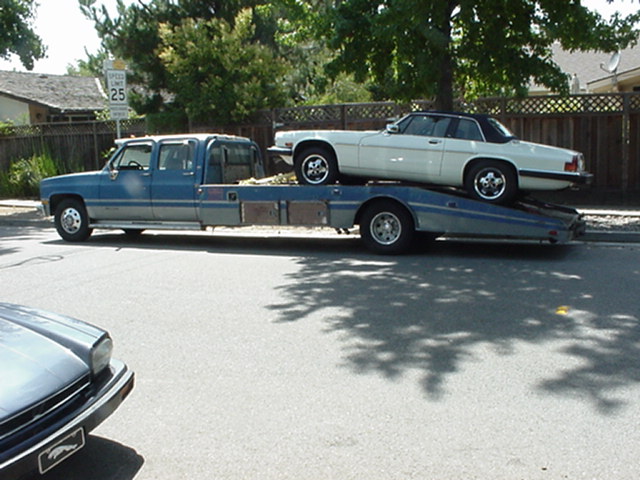
Part 2 Well I finally was able to begin actual work on the XJSC itself in the late summer. I had left the car all together with its good running V12 until a buyer could be found (used engine shoppers always like to hear a motor run before they plunk down the cash, especially V12 Jags). In late July a buyer came through, and by early August the engine and trans were pulled and we were on to bigger and better things. First order of business was to clean the car up. Even though the XJSC had fairly low miles (75k total), the engine and trans had done a pretty good job of spraying oil and goo on nearly everything underneath. So onto the car carrier it went for a trip to the steam cleaners. I recommend this to anyone doing a conversion. The cleaners had the car up in the air and cleaned every inch of it from nose to tail. It is so much nicer to work on a car with no sludge or whatever underneath- it’s well worth the $100 (or usually less- mine was $55 since it’s easy with no motor…) and you’ll thank yourself later. Here's the XJSC getting a lift to the cleaners.....
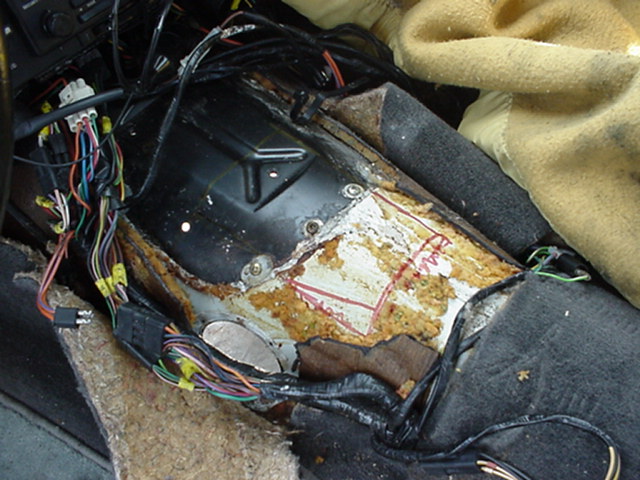
Before the new engine could go in, some basic upgrades were in order. First off, the steering rack bushings were changed to our polyurethane replacements. It’s a very basic job made so much easier when you have extra access to the rack (like when the engine is out). This makes it a 30 min job, vs. 2+ hrs when you have to do it from underneath. Also on the menu was a 1” front sway bar upgrade, this with one of our bolt-in kits. This is also much easier to do when the engine is out (also about 30 min vs. 2+ hours with an engine in place). I also had to replace a couple of ripped rack boots, and spring for new front subframe mounts(front and rear)- a simple task with no engine or exhaust there to bump against. All of these upgrades went smoothly and we could move on. A few other small details were taken care of in the engine compartment at this point- cleaning of the silver heat shields, small repainting of a few areas under the master cylinder that were damaged by leaking fluid, and general tidying. In an earlier installment, I mentioned how I had used the XJS coupe “mule” to do the rough cutting/ hammering/shaping of the trans tunnel/shifter area to accommodate the 6 speed trans. Now it was time to transfer all of that knowledge to the new car. I carefully measured the shifter hole size and location on the coupe, and then outlined a much tighter opening on the XJSC tunnel. I figured I could always make it bigger, but putting material back in is harder…. Anyway, holding my breath, and hoping for a steady hand, I cut the hole with a 4” grinder with a cut-off wheel. All went very nicely, and the hole is clean. I little minor reshaping of the left side of the tunnel (wider) and we were ready for the new motor and trans. Here's a photo of the XJSC trans tunnel marked and ready to cut (in red). As you can see, the new shifter hole is actually rearward of the original automatic shifter mounting plate (in black).
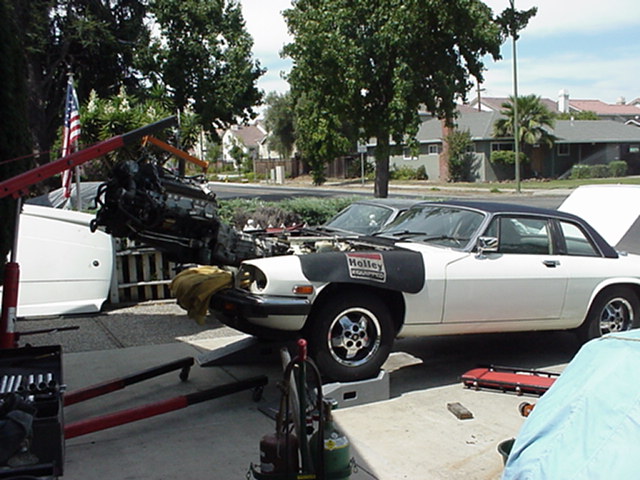
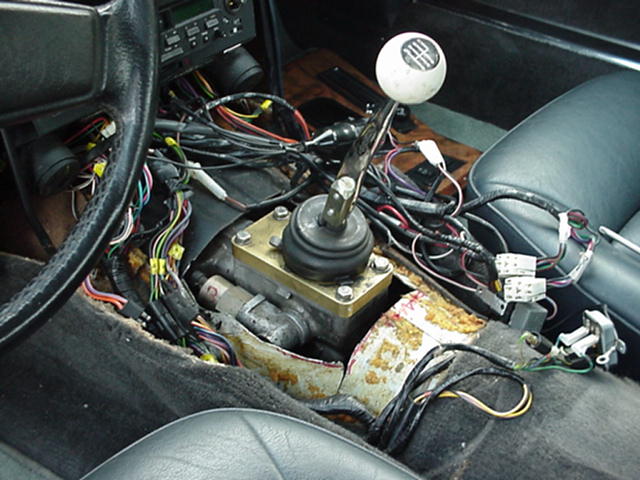
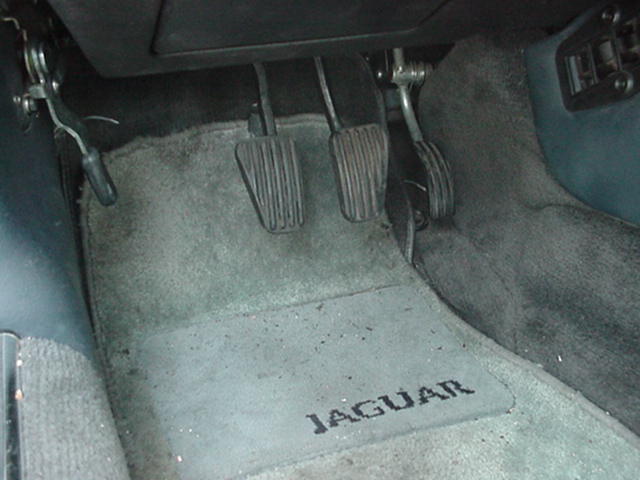
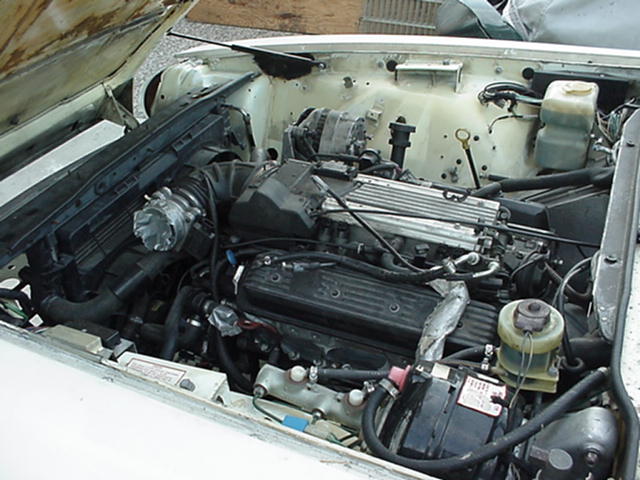
And now, the moment of truth.... To my great relief, the LT1 and 6 speed slipped into the XJSC like they were made for it. The engine and trans mounts from the trial fit on the coupe were transferred over and bolted right up. The tunnel fit and shifter hole were perfect, far exceeding my expectations. Virtually no additional work was required in that area, short of now concocting a shift boot installation and modifying the ski slope for the shift lever location. At this point I pulled the original (automatic) pedal box from the XJSC and trial fitted the new manual (clutch and brake) pedal box modified in the previous installment. Some final minor tweaks in the pedal arm bending and pedal pad location were made to be sure my big feet could work everything smoothly. Here are a couple of photos of the shifter location in the tunnel, and the final clutch/brake pedal locations.
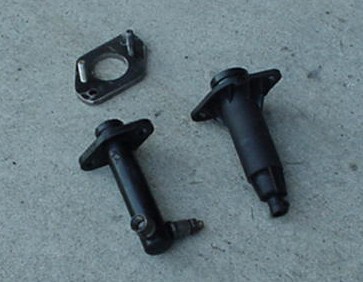
Now I turned to the biggest mechanical issue I was expecting with the swap- clutch operation. The factory XJS manual transmission cars use a hydraulic clutch release system with a master cylinder and conventional slave cylinder. As shown in the previous installment, the master cylinder is mounted vertically (very unusual) due to space limitations. This master cylinder is a ľ” dia bore with approximately 1” of usable throw. Although I didn’t have one to look at, I assume the Jag slave cylinder is likely 5/8” bore. As a contrast, the stock Camaro clutch hydraulics are ľ” master with a 1” (!!!) slave cylinder. I believe what’s happening here is that Chevy is using the hydraulic advantage of small diameter master and larger slave for lower pedal pressure feel to the driver. As a general rule of hydraulics, a slave cylinder of smaller diameter than the master will move (linearly) more than the master when actuated, and vice versa. The Camaro master cylinder installation appeared to have a longer overall throw than the XJS master, which is probably why the 1” slave cylinder (relatively large) would still do the job. Unfortunately the Camaro master is not at all compatible with the Jag pedal box; both the master and slave were manufactured with hydraulic fittings not easily compatible with convention tubing or hose (and the slave has no bleed screw- weird), so they will remain just reference pieces. Instead, I started to look at Chevy truck (S10 and full size) slave cylinders to mate to the XJS OE master. The truck slaves all have conventional flare fittings, are made of steel, and have a bleed screw as well. They were also designed (in general) to mount similarly to the bell housing as the Camaro piece did. As a first try, I started with a 13/16” diameter slave cylinder from a 4 cyl S10. By making a small adaptor plate, I was able to mount the slave in the T56 and then cobble together a hydraulic line to test. Here's a photo comparing the S10 slave (left), and the Camaro slave (right);
the adaptor plate is above.
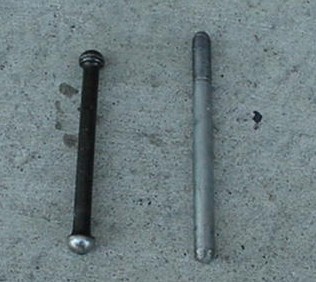
I also made a slightly longer pushrod since the S10 slave sits further from the clutch fork than the Camaro slave did.
Here's a comparison photo: I wanted to use a 15/16” slave, but I wasn’t sure if the XJS master would displace enough fluid to move the slave far enough to release the clutch. As mentioned above, the XJS clutch pedal moves the master cylinder push rod 1” max from rest to full press (on the floor). With a ľ” diameter, that translates to .44 cubic inch displacement of fluid. For the sake of the first test, a 13/16” was tried, which would move approximately .85“ with this fluid displacement. The real trade off here is clutch release movement vs. actual pedal pressure. A smaller slave might travel further for a set fluid amount, but would have a higher pedal pressure. The larger slave would travel less, but pedal pressure would be lighter. After some real fun getting the system bled properly, I verified that it works. The Jag master cylinder and 13/16 S10 slave work well and release the clutch. The only down side is that the pedal effort is higher than I like. I’ll leave it for now and try a 15/16 master cylinder later. At this point, the driveshaft was installed as well, and it fits perfectly. It is the same 39” overall length as one that might be used for a V8 conversion with an automatic trans (T700R4/4L60E).
Next order of business is to get started on the plumbing and wiring of the engine compartment. And I’ll also sort out the header situation (need something that will please the emissions inspector). All of that will be covered in Part 3.
|