Telephone: 408-839-5569
Email: (Click Here) Andrew@JaguarSpecialties.com
Last Update 7-2-24
|
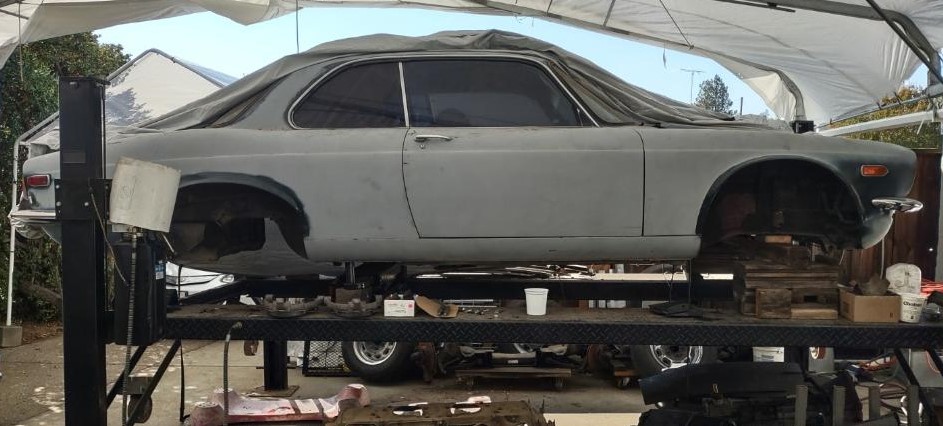
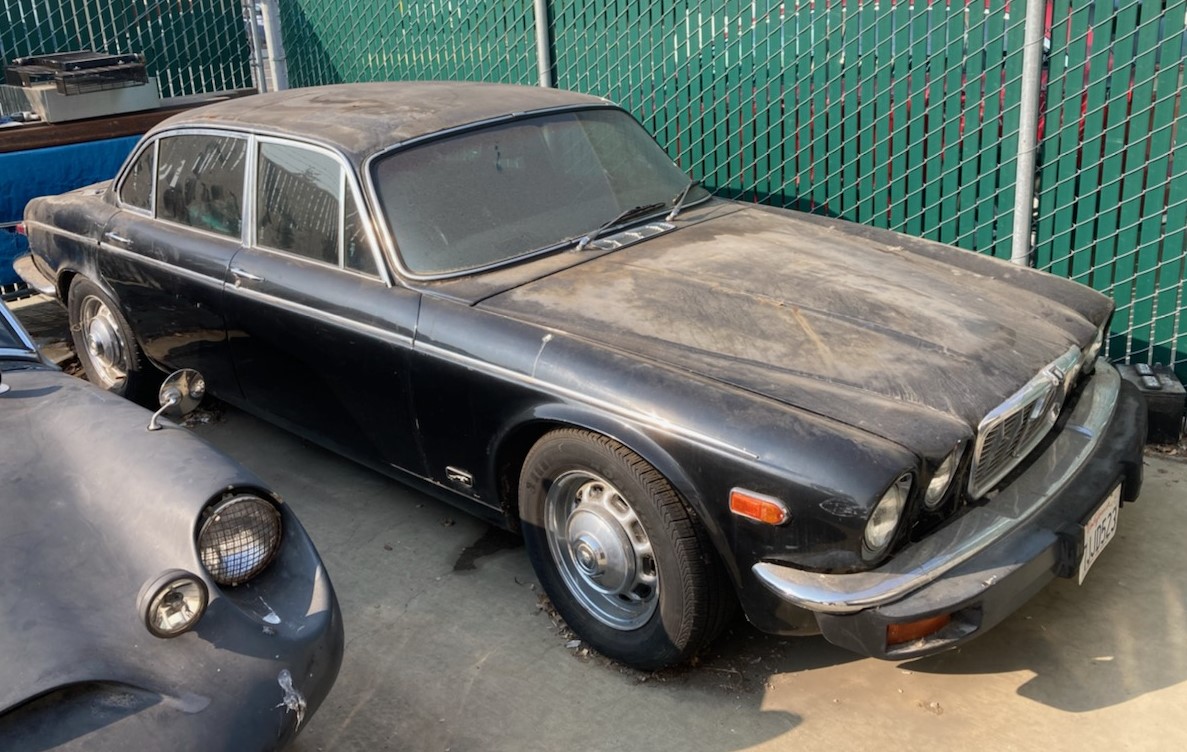
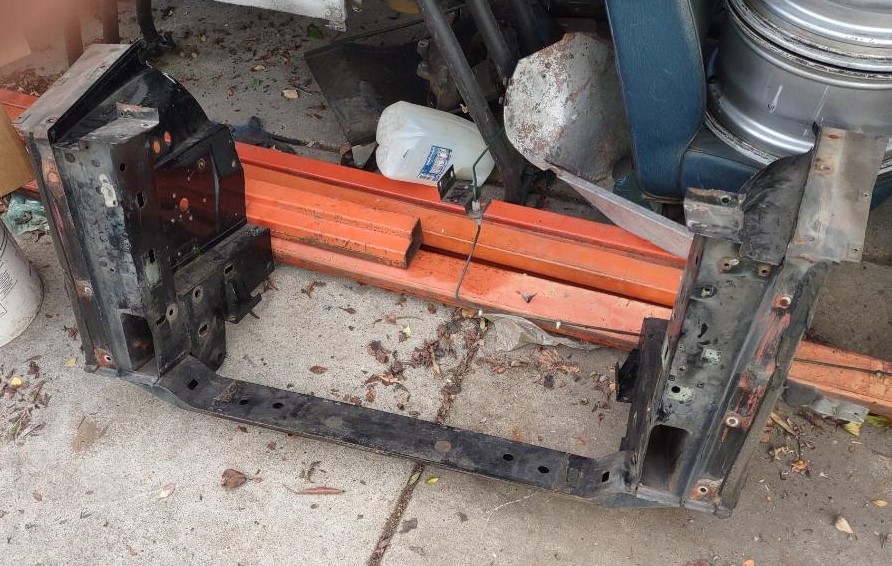
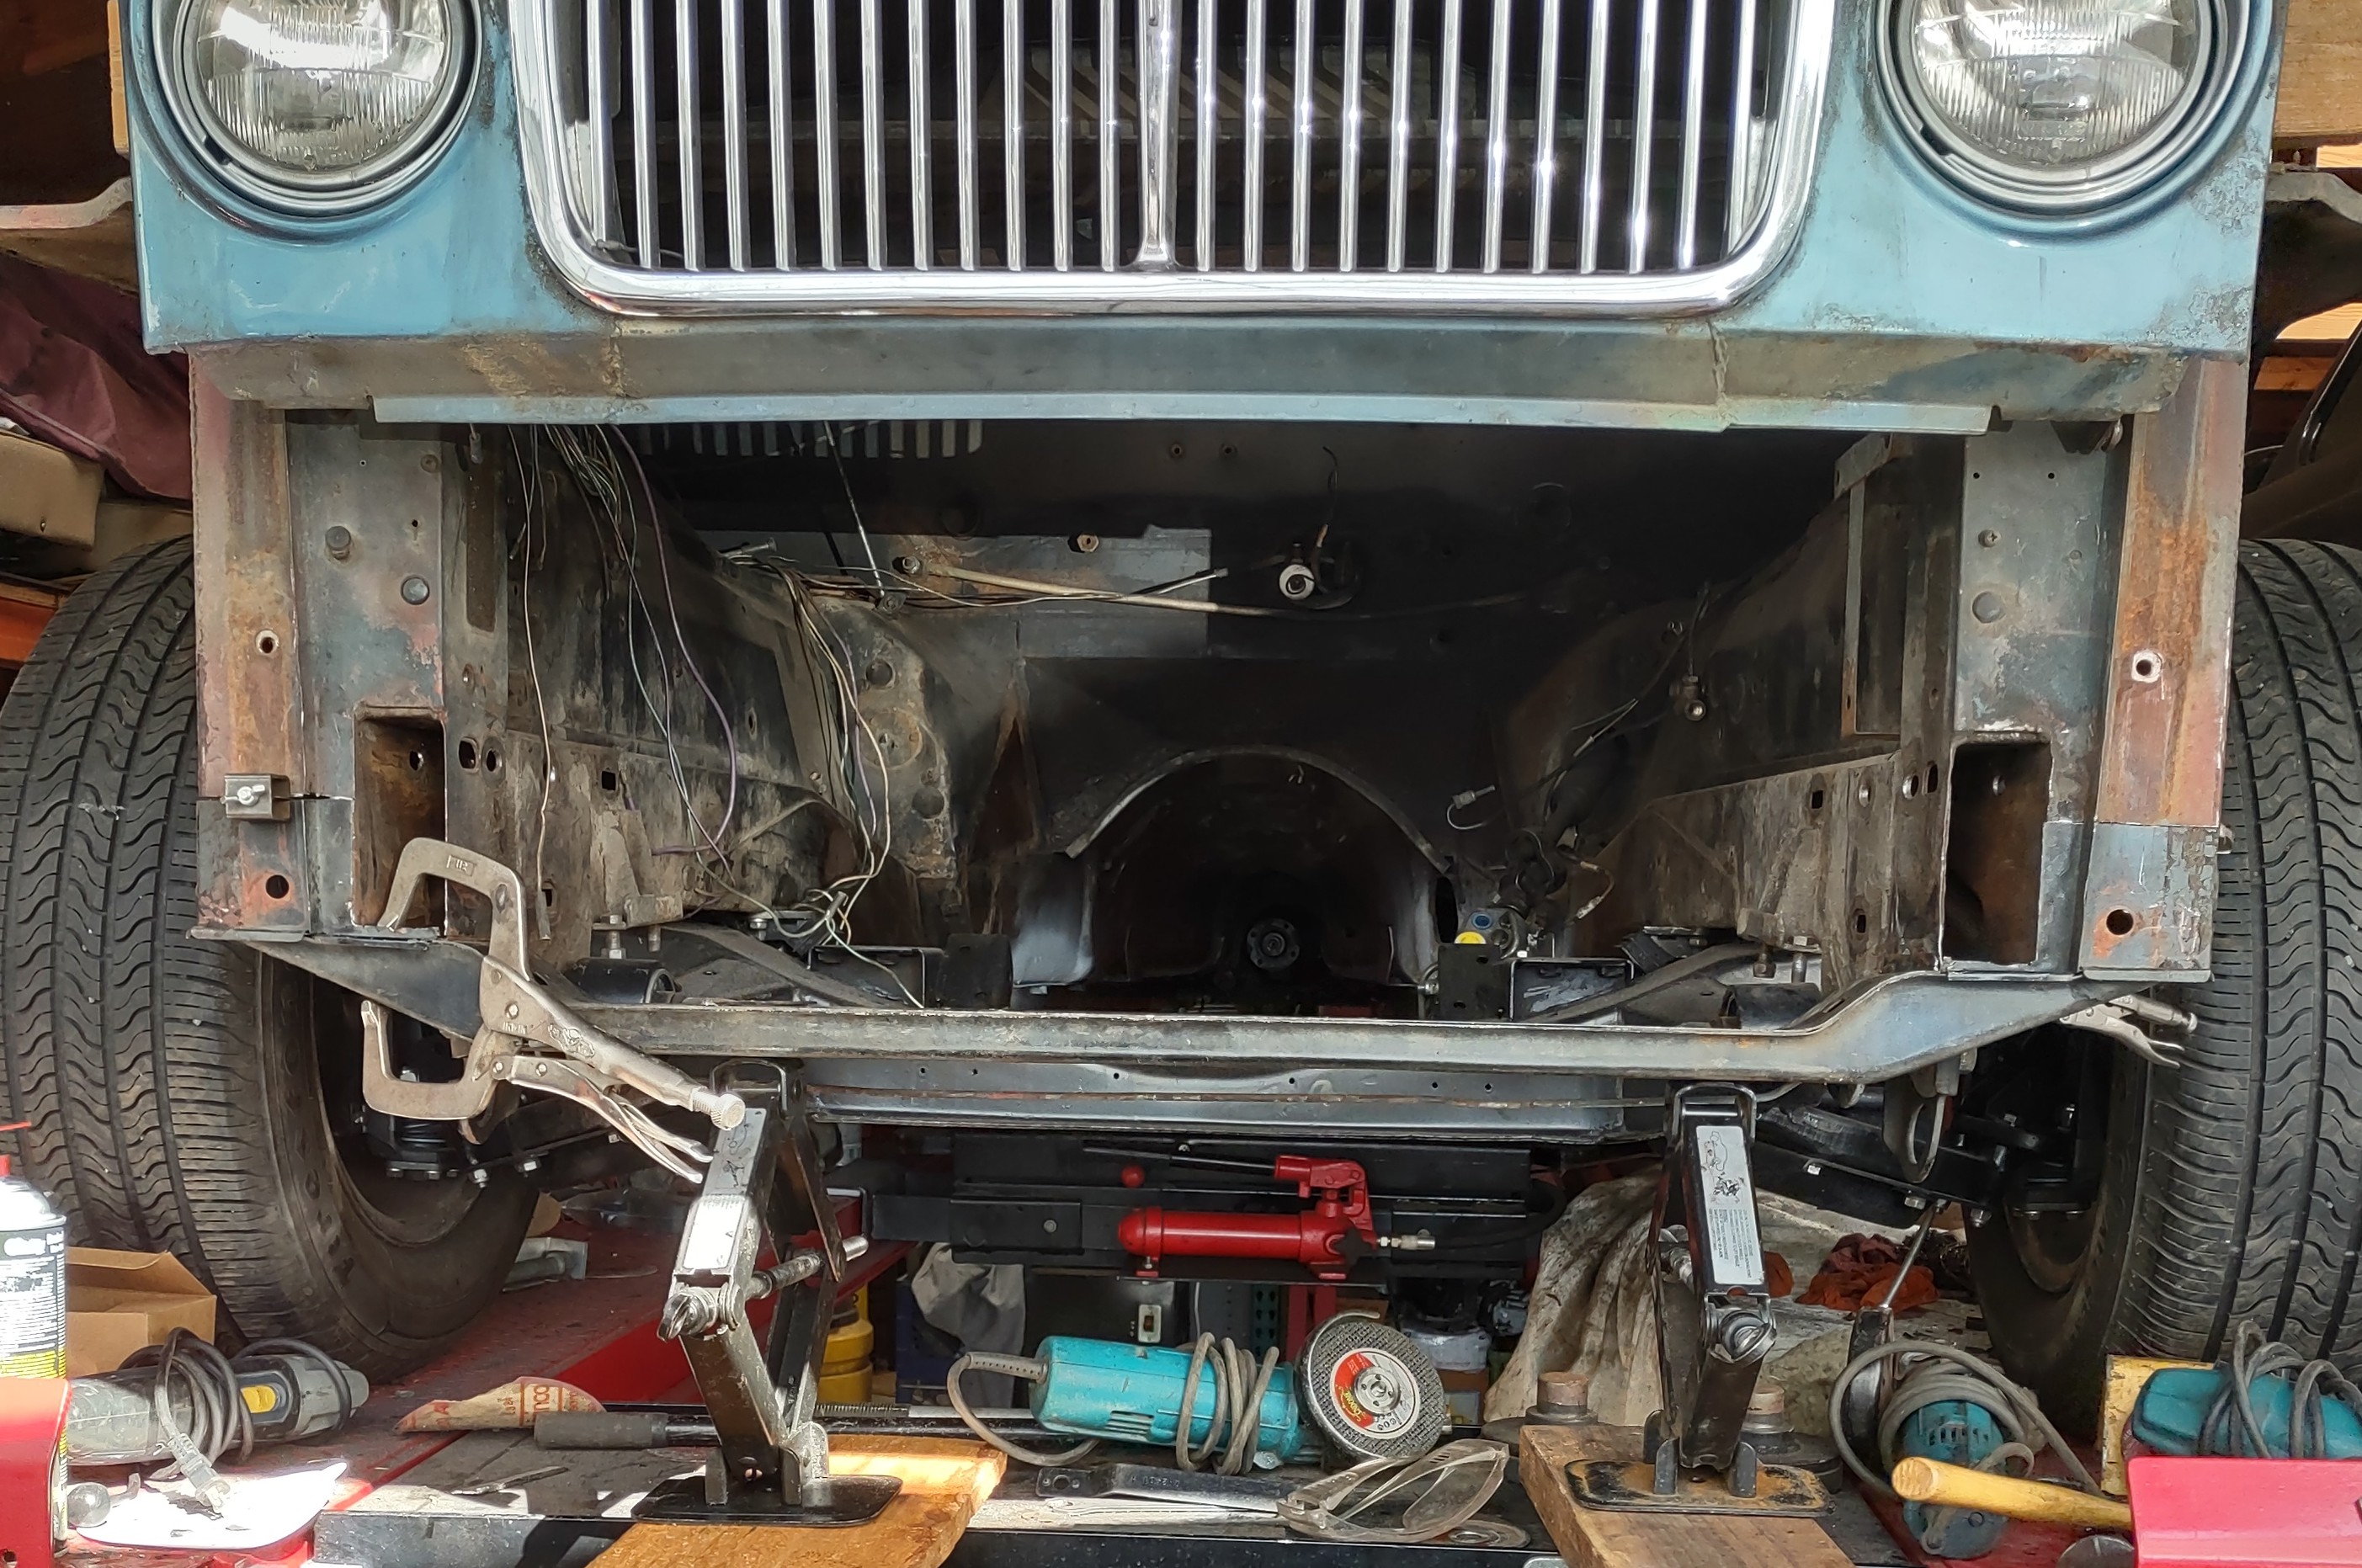
Project XJLS-C An XJ Coupe with European flavor, modern handling upgrades, and a 400 hp LS2 + 6 speed manual trans surprise under the hood....... Part 2 March, 2024 We've been out of touch for a bit but very busy with this new coupe project. Pretty much as I should have expected, to do it right, this had turned out to be a much bigger than first appearances. We talked earlier in the Part1 about the mechanical plans for the project, but mentioned nothing about the body and condition. Let's get into that now. If you remember anything at all from this article, remember this: cars from the Southwest are never really rust free, despite what we might hope. That applies especially to 50 year old Jags with bad window seals that have been sitting outside for a while. This car originally came from Arizona and was a leftover project at a local custom car shop in San Jose, near me. The shop was closing and we ended up with the car. First inspections poking a prodding seemed ok- only the right rear floor had rust bad enough to see ( the floor was hanging down- it was toast). We got into pulling the car apart and were down to an empty rolling shell essentially. Underneath looked like most of them- lots of sticky undercoat. None of it was even and so since this is a car I wanted to keep for myself, it had to come off. So the fun began- a nose to tail scraping of all the nasty black stuff and may surprises popped up. In the end we had a trash can filled with (literally) 30 lbs of undercoat. Underneath all of that, here is what we found:
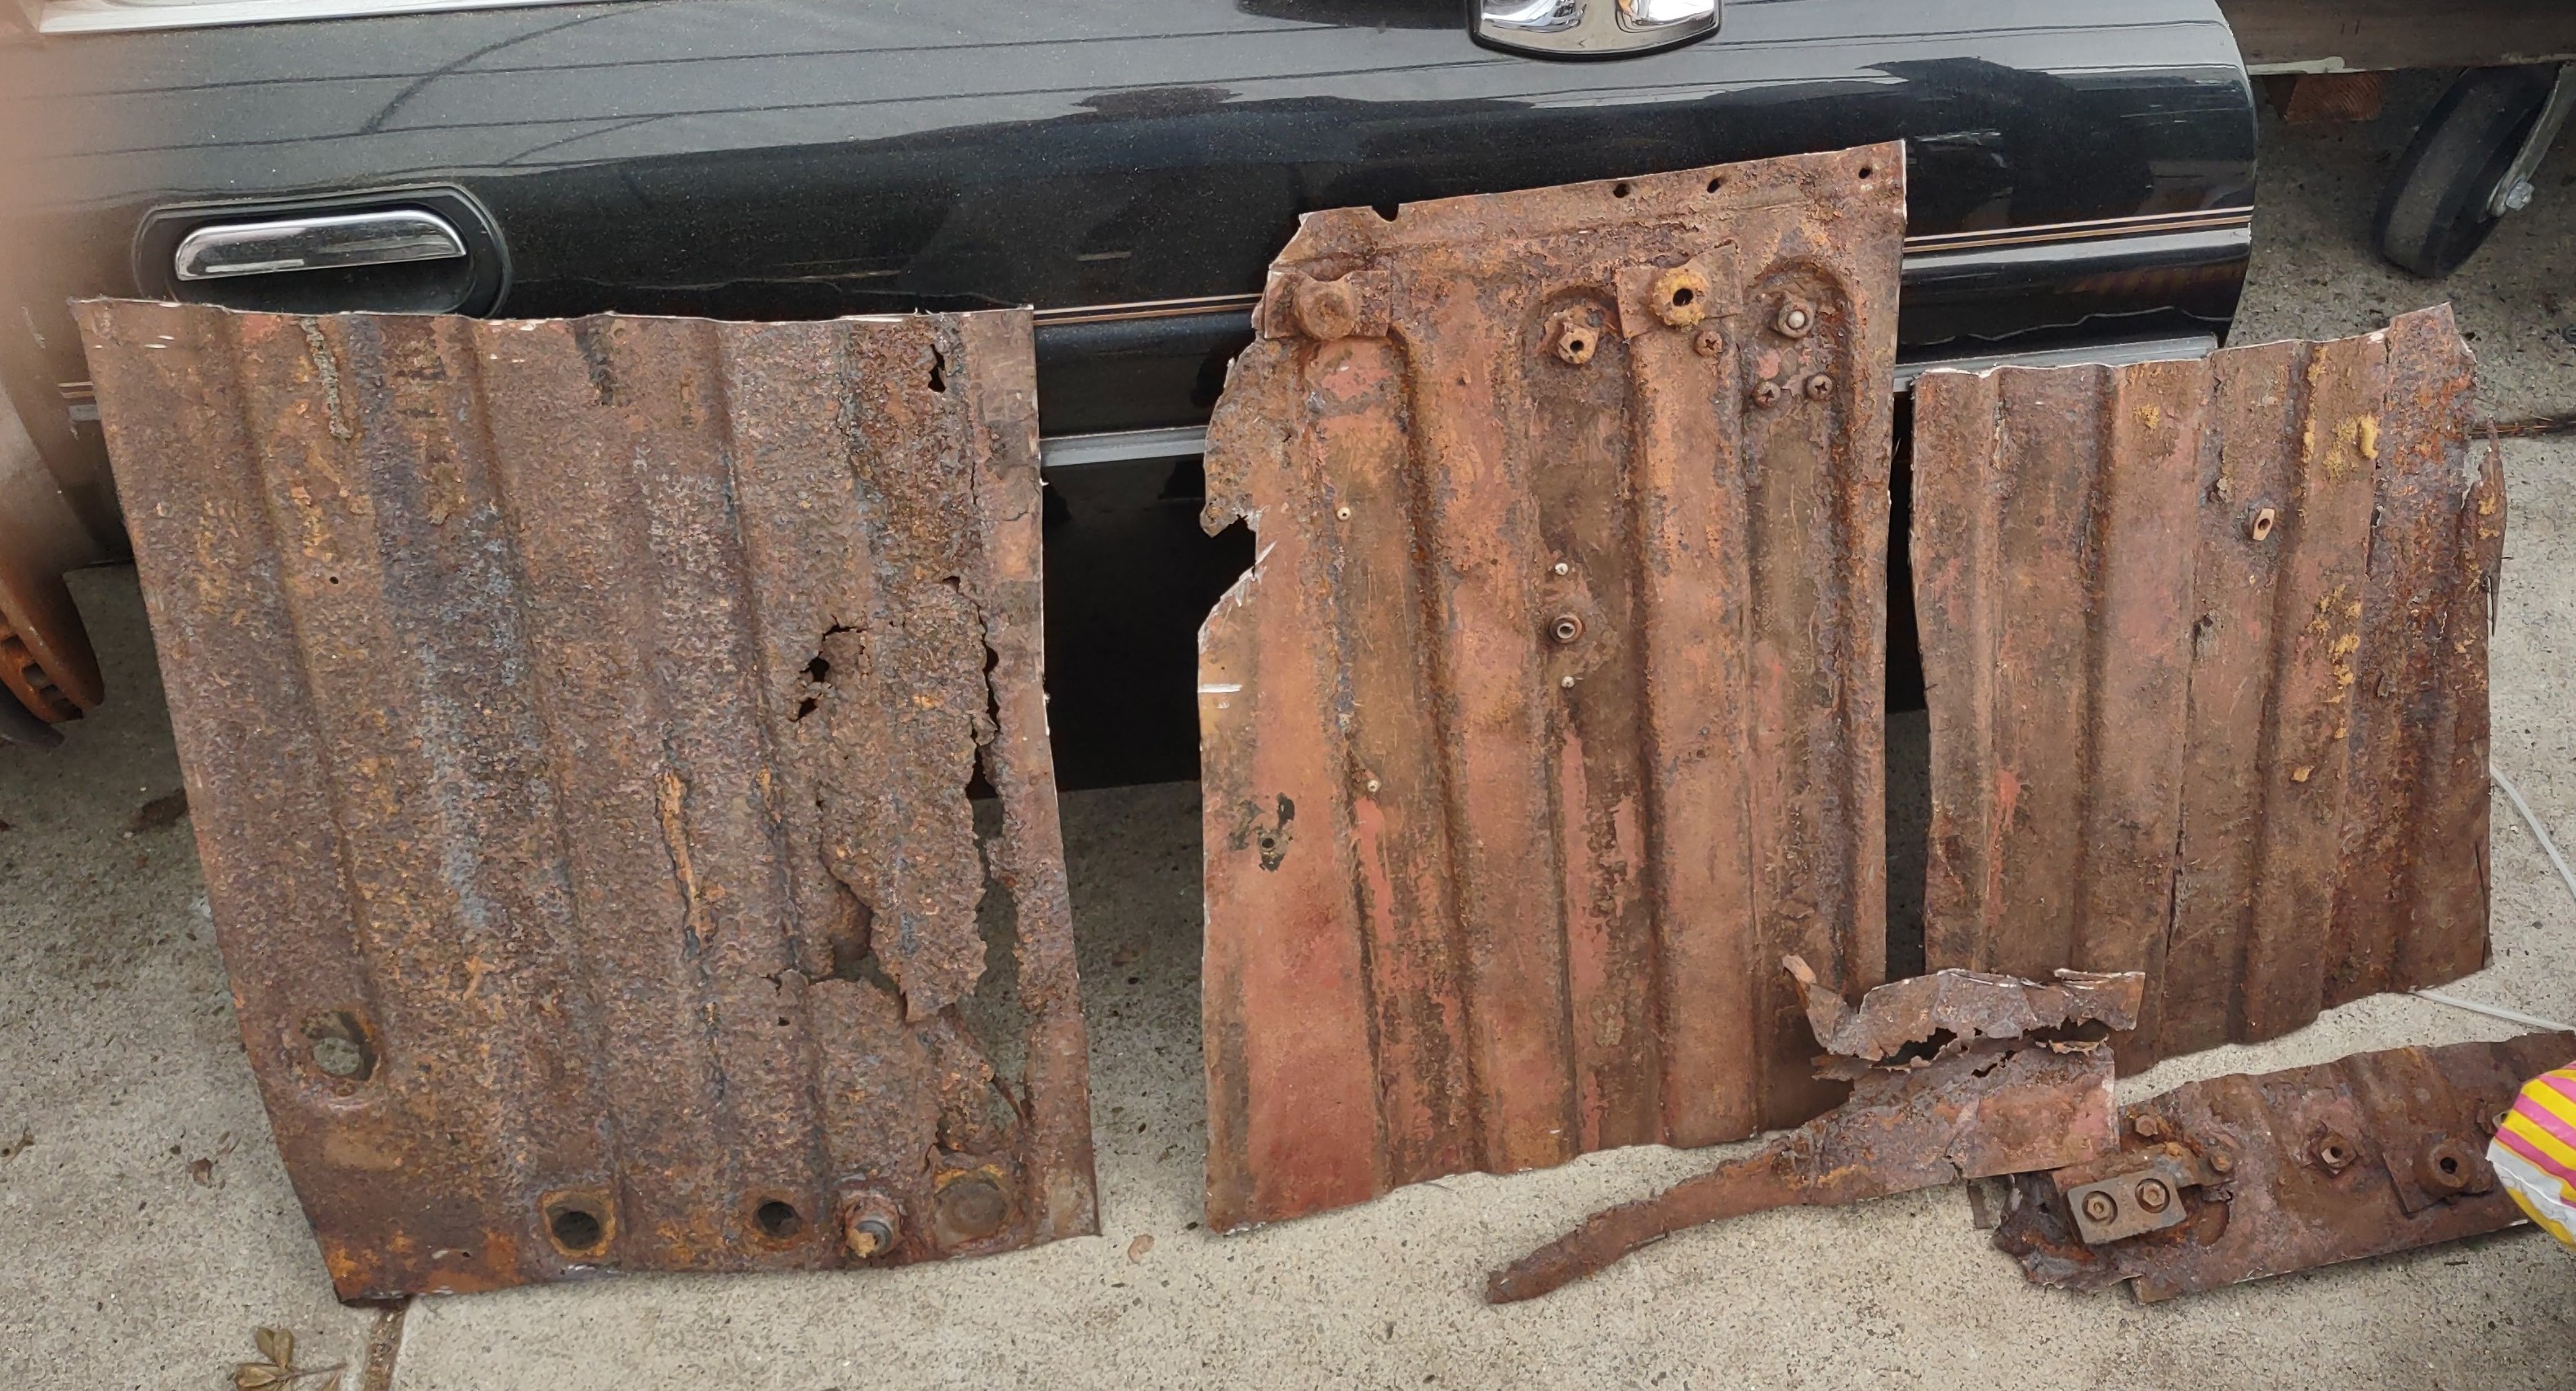
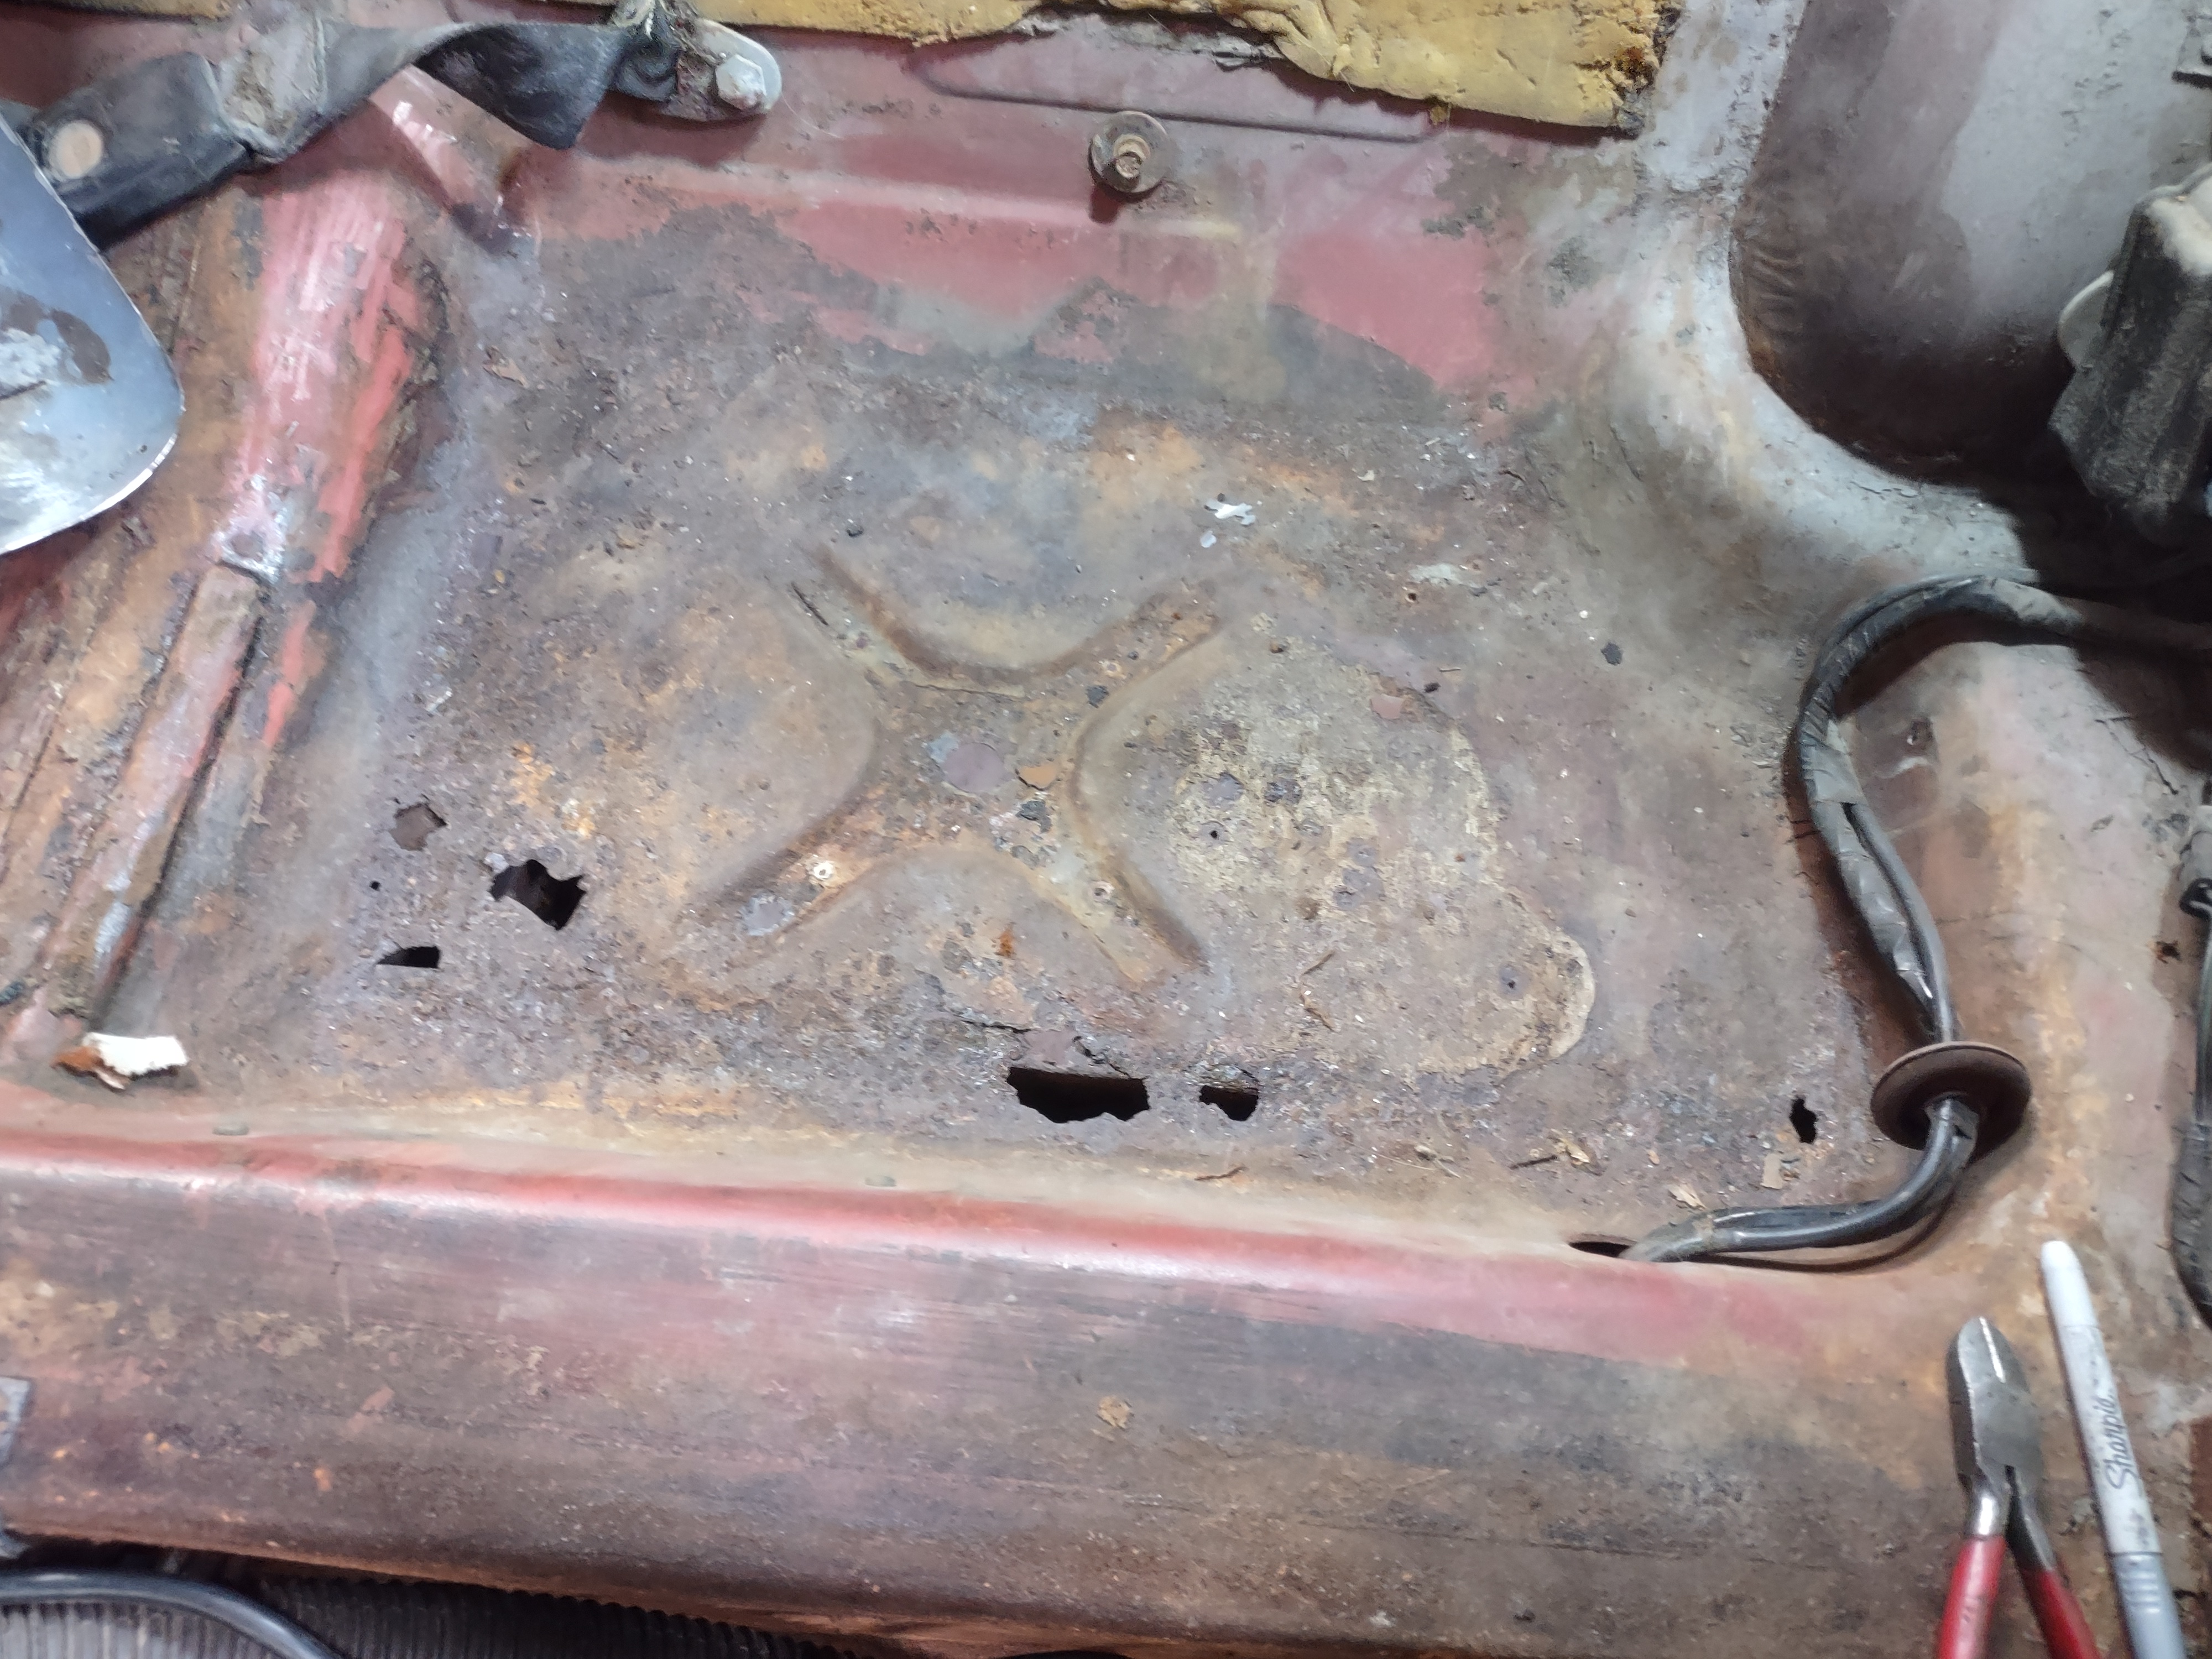
The good news was nothing structural was affected (really) and no external welded panels were rusty either. So it seems we had our work cut our for us- literally. Here is the car as we got started and a pic of the floor sections that were removed as well as the rusty rear seat pan areas. The radiator support damage was hard to see in pics.
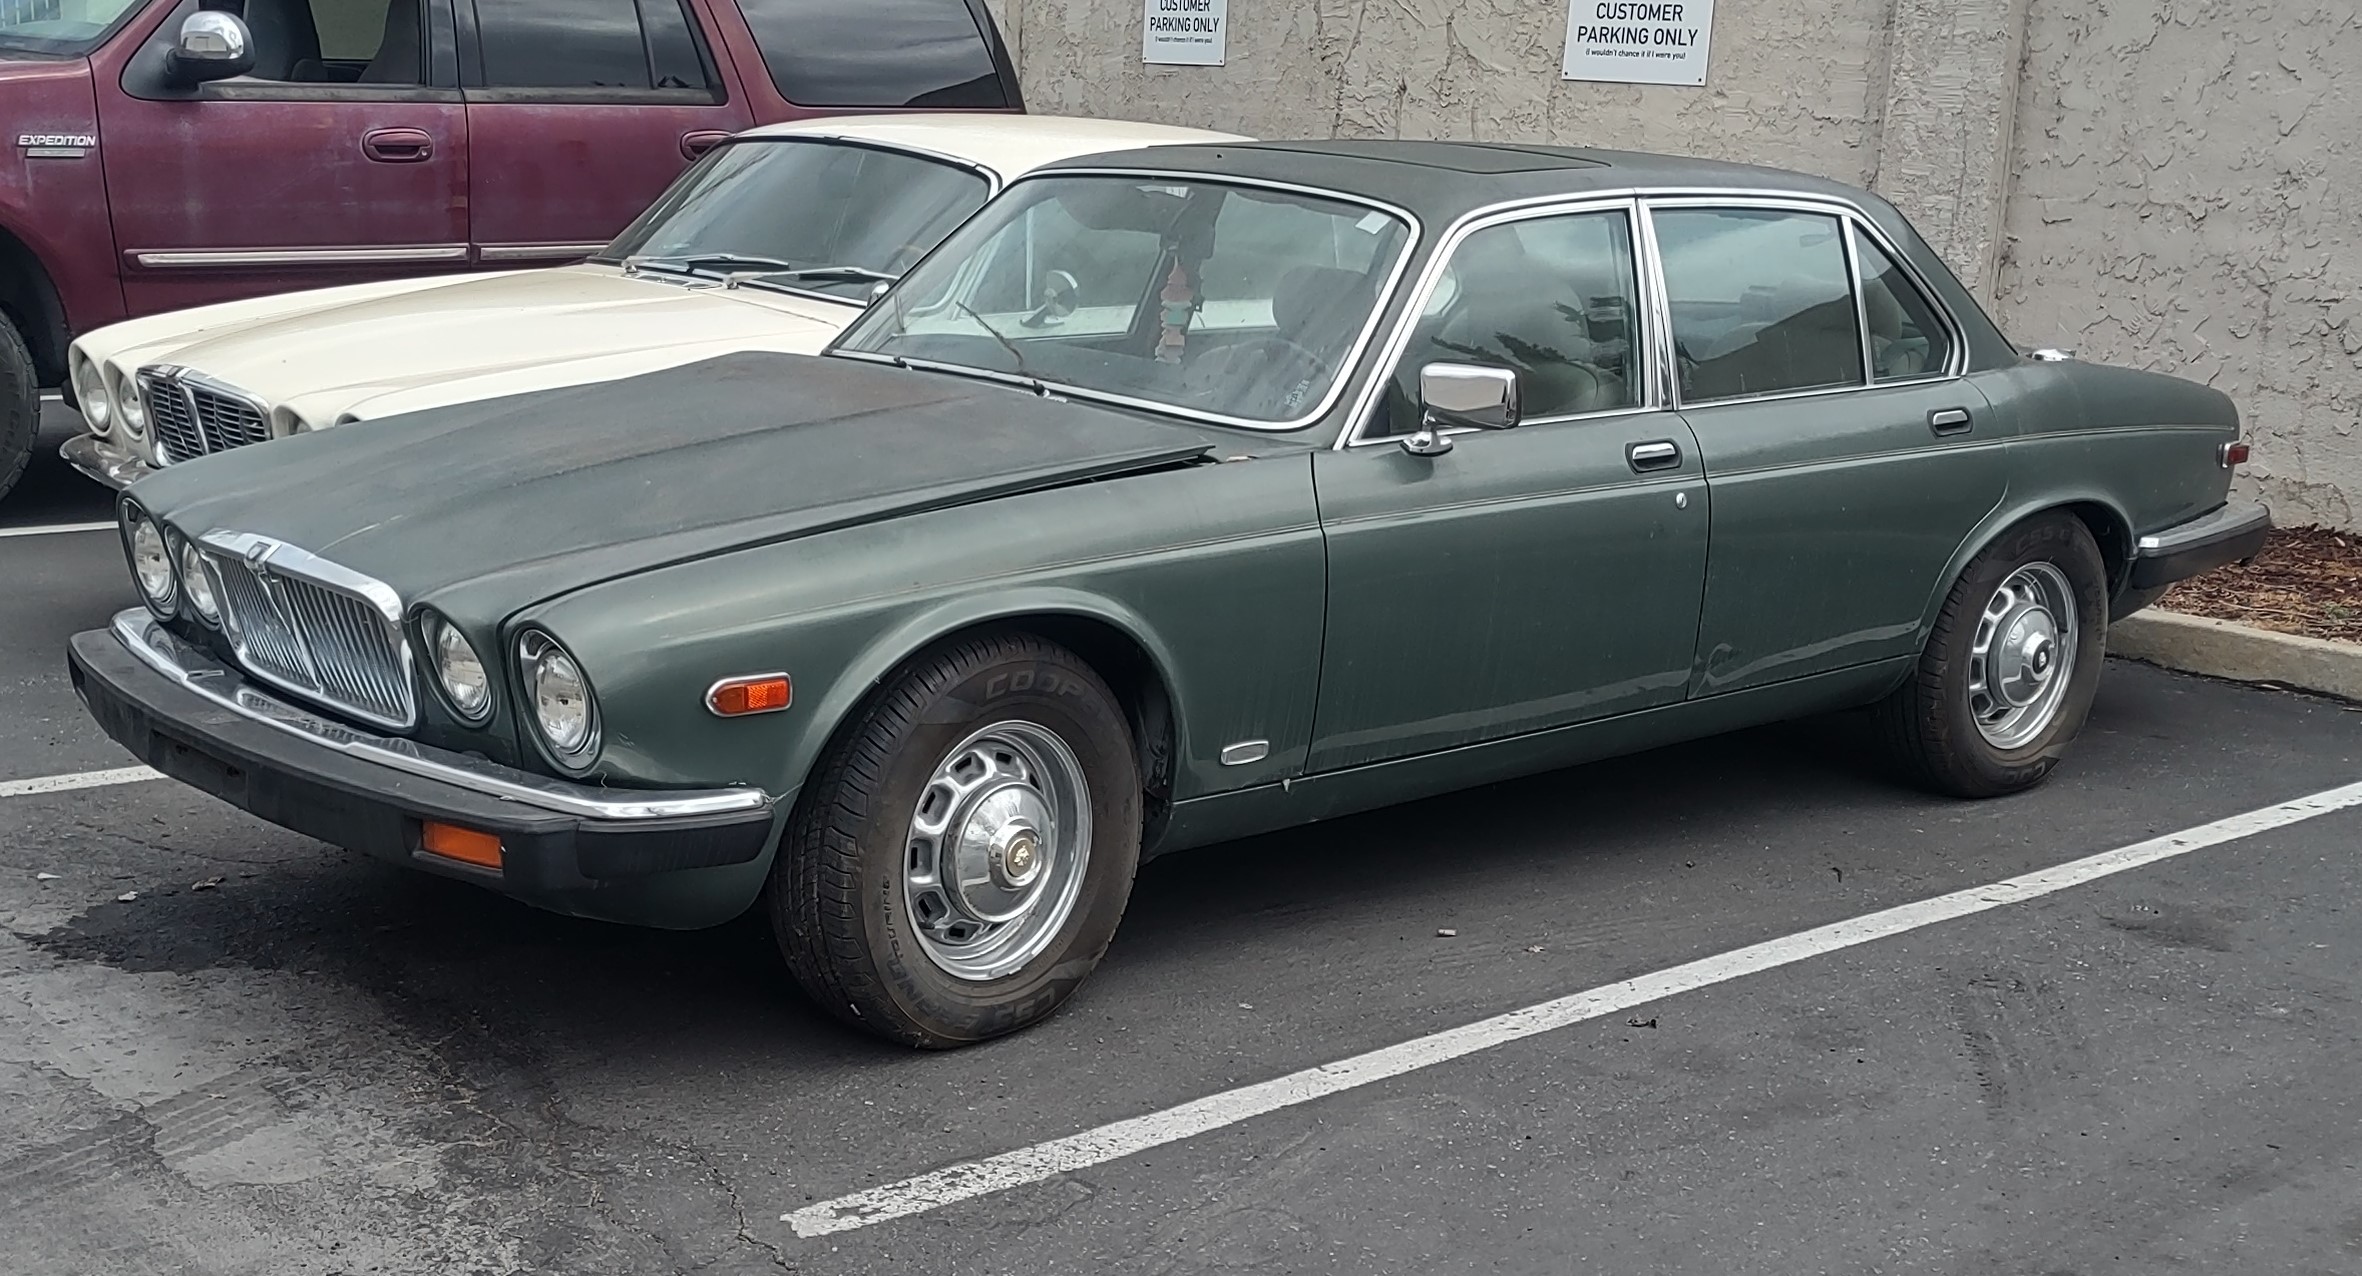
Now this is maybe the interesting part. I have done this sort of repair many times before and one thing that always seems to be consistent is this- reproduction parts should really be called "similar reproduction parts". I say that because in many cases they don't fit, are significantly different, and even the wrong gauge metal compared to the originals. And where I am, broken down rust free XJ6 sedans are plentiful so I decided to use donor cars,. Jaguar is a small company with limited funds so many of the body/shell stampings from an 80's XJ6 Series 3 are the same as those in my 75 XJ coupe. So that's the way we went and procured several ratty but straight donor cars over several months for the various pieces. And this is a cheap approach- a ratty Jag like this is maybe $200-$300. Since this wasn't a project on a deadline progress moved slowly, getting worked on from time to time. Here are some of the donors that helped the project along. 76 XJ12L Right rear floor (which is unique to the 70's XJ's before Jaguar actually retooled the rear stampings for the longer wheelbase of the later cars). This car had a short rear floor with a 4" wide extension panel behind it to make the L. I kept the floor and tossed the extension. We kept many other pieces as well before it was (ultimately) sent to the crusher 84 XJ6, 86 XJ6, and 86 VDP We needed other floors and misc sections for the rust repairs and no one of these cars had all of the right pieces in usable shape. Ultimately after chewing through all 3 we had what we needed. Additionally the 86 VDP had a perfect radiator support so that was cut out and set aside. Here are the donors- thanks for your sacrifice:
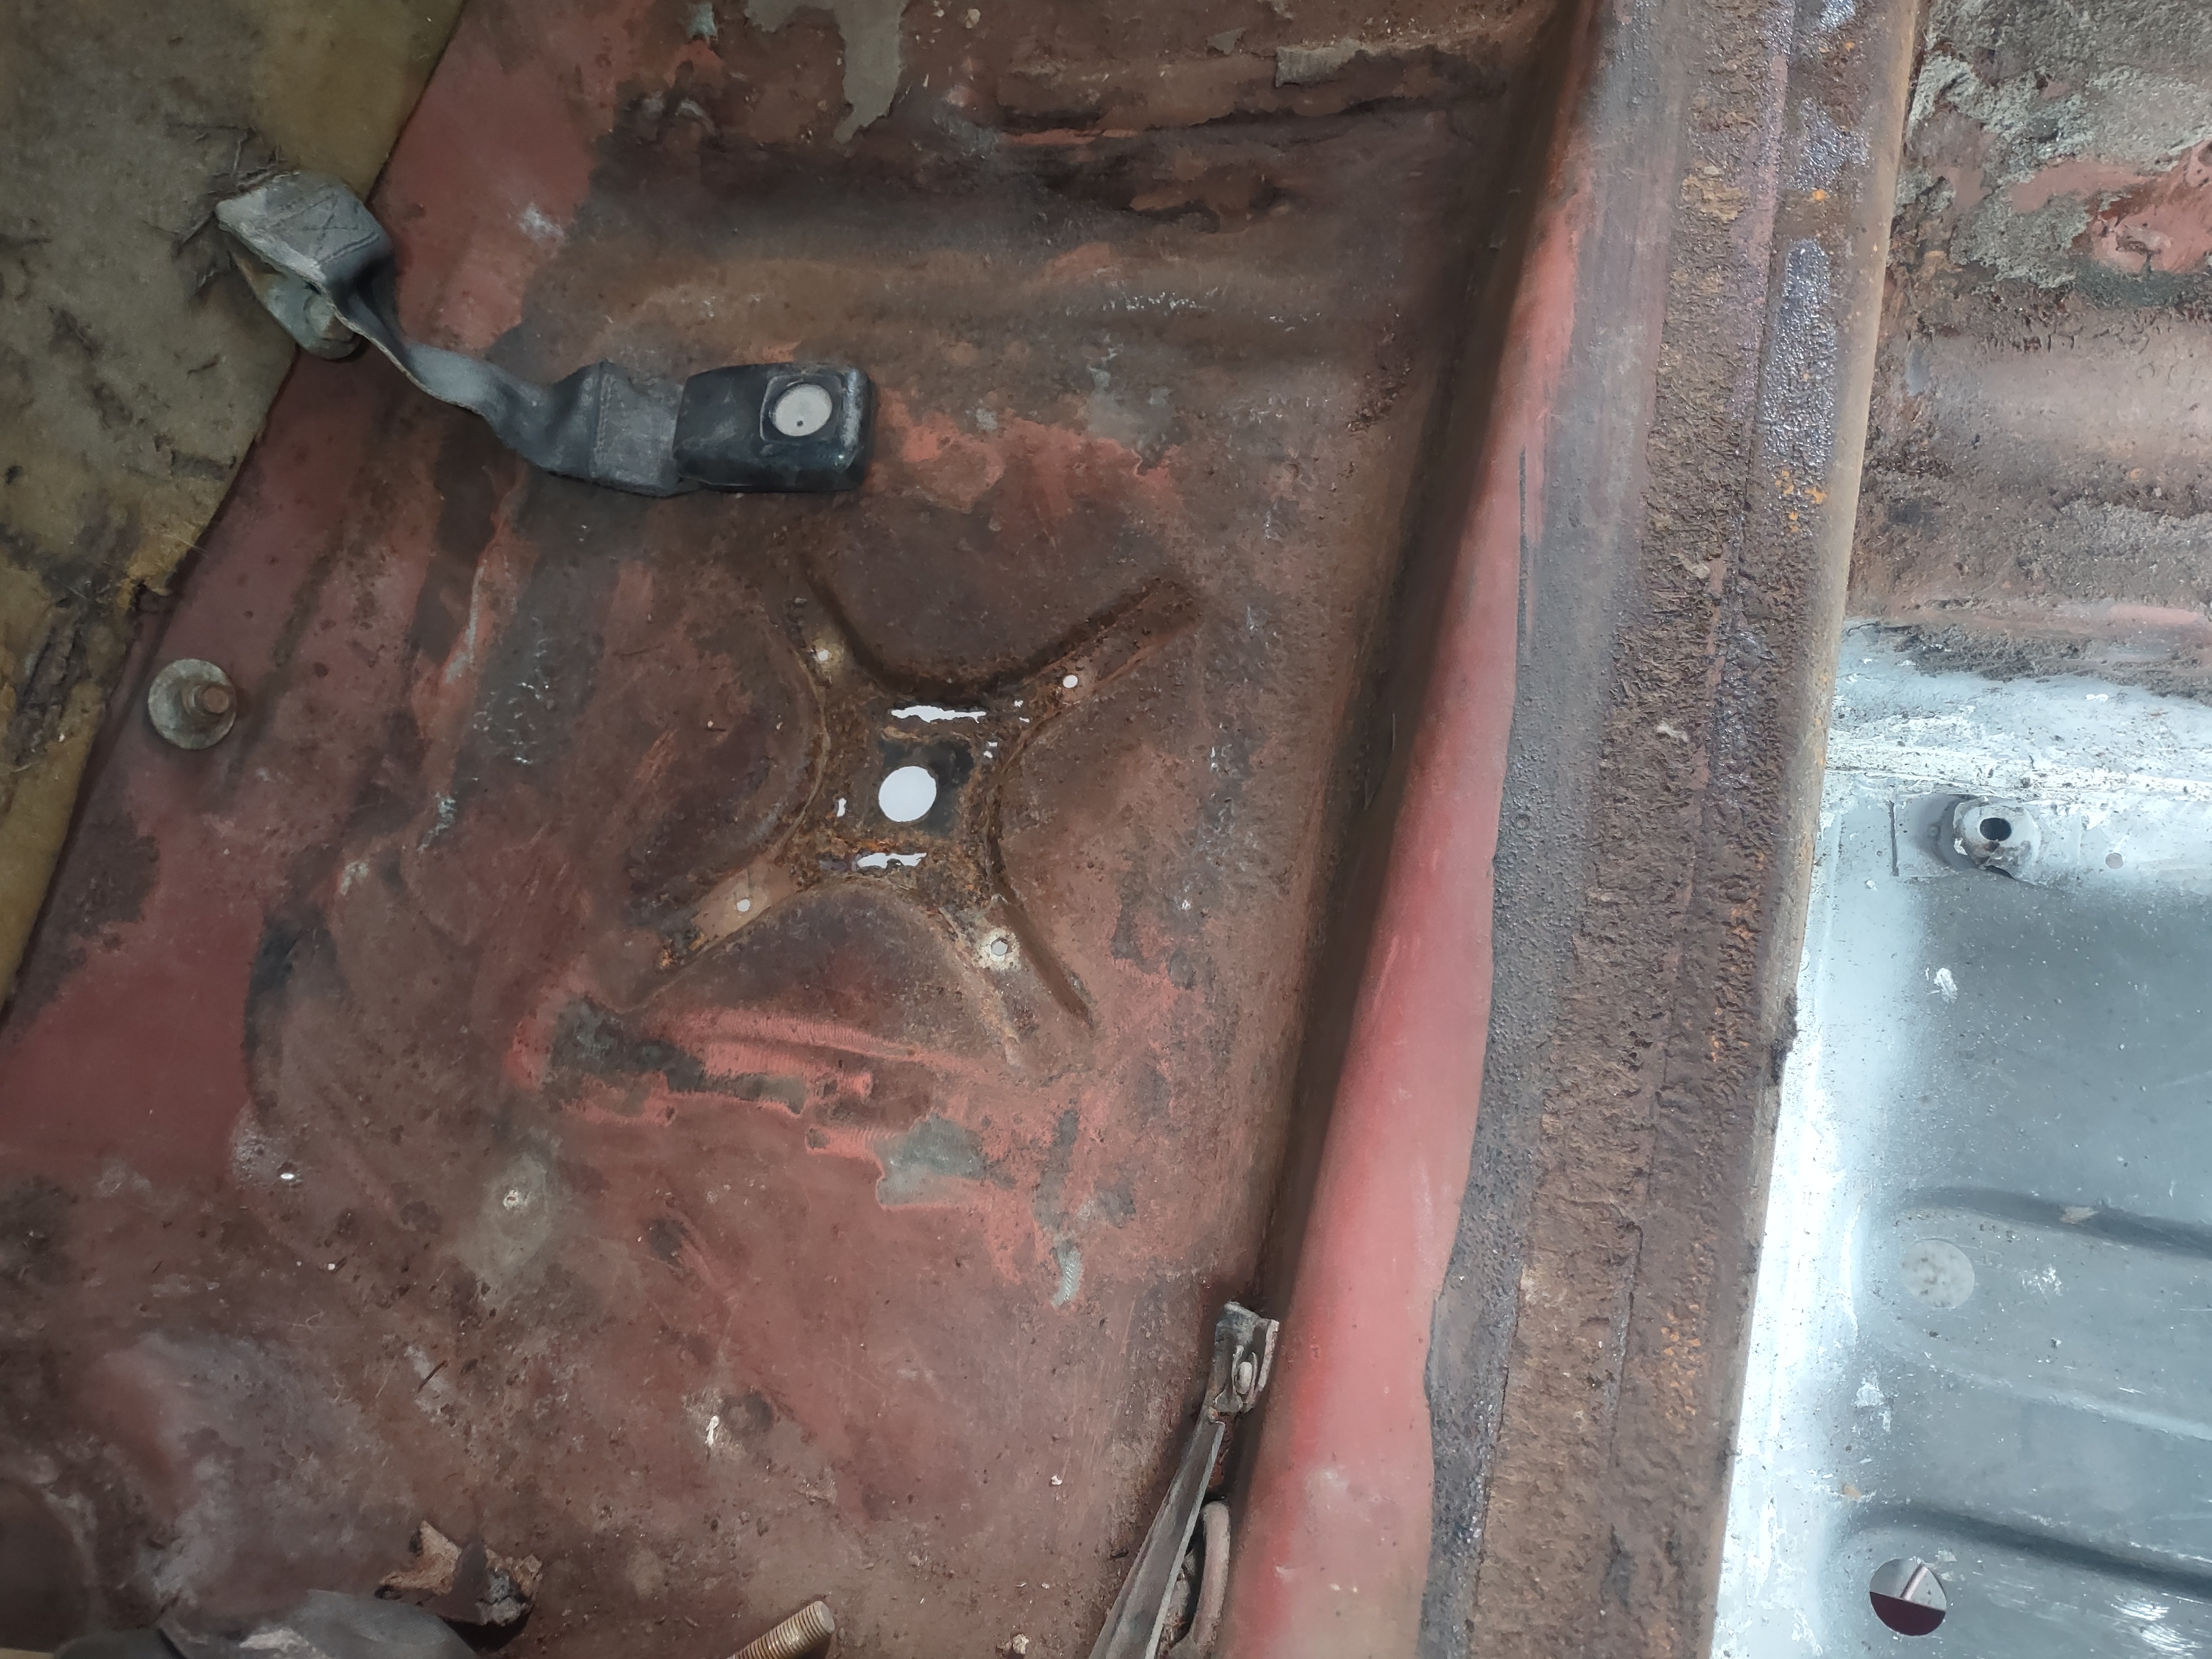
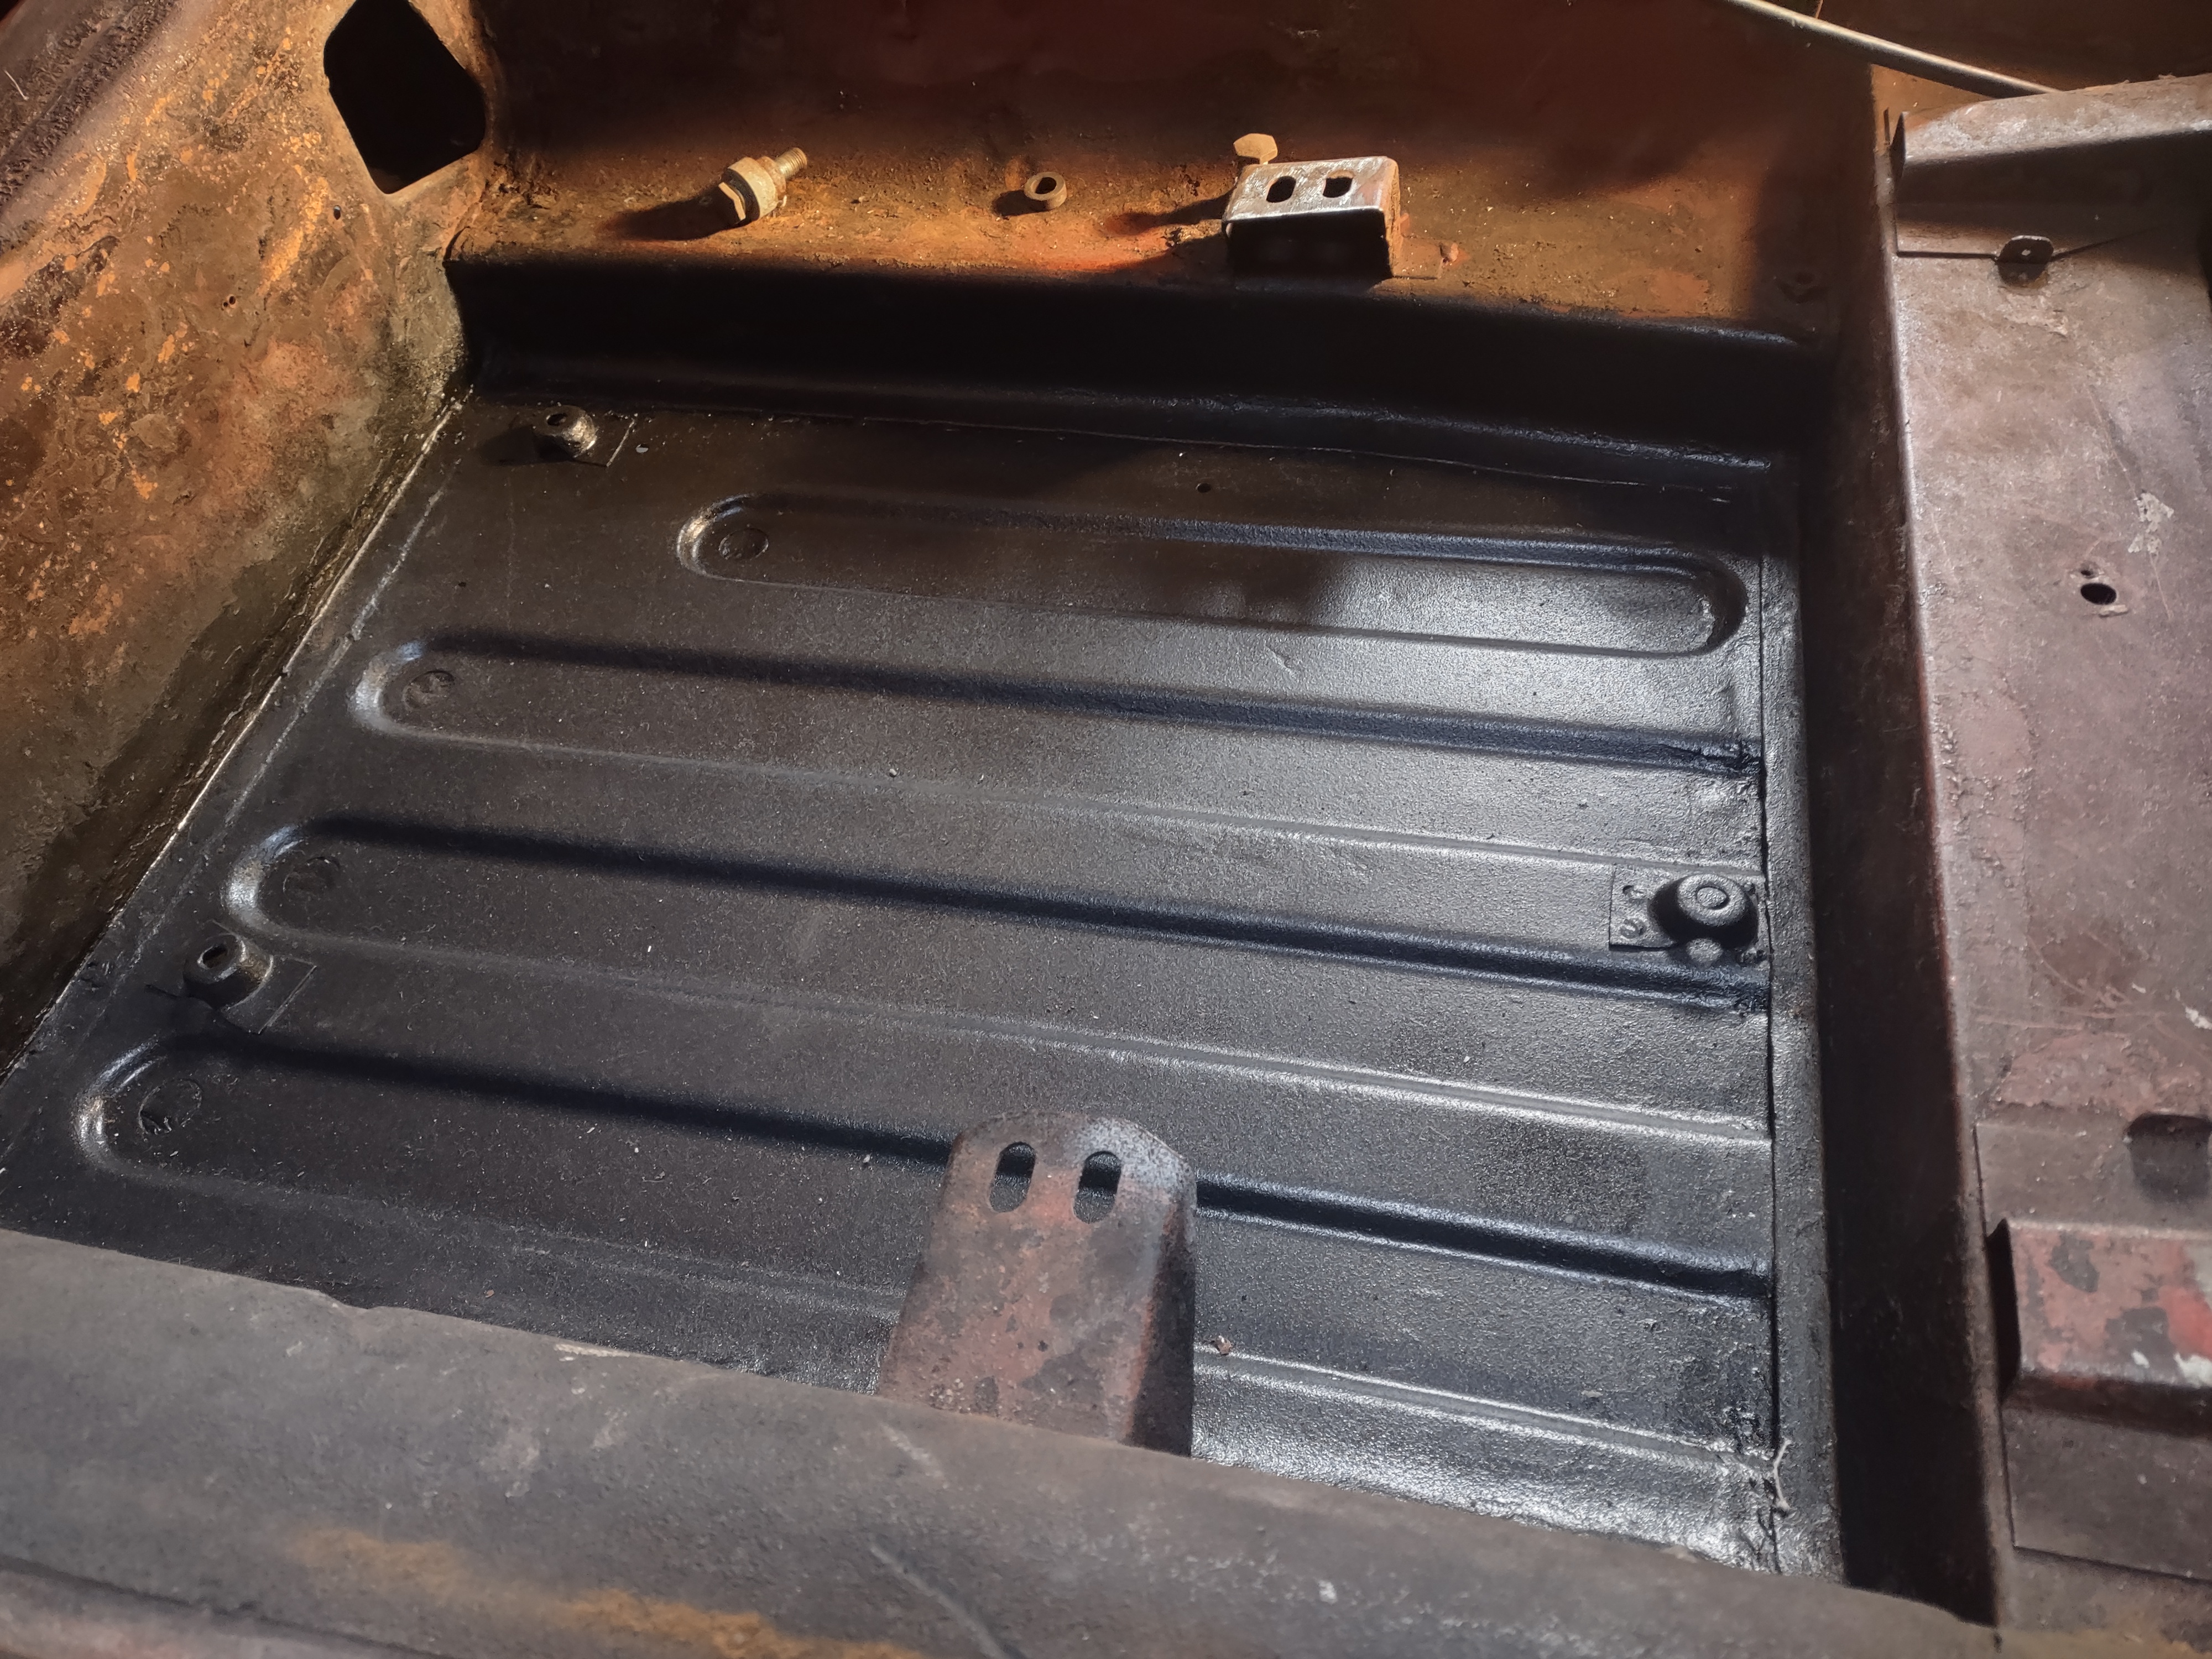
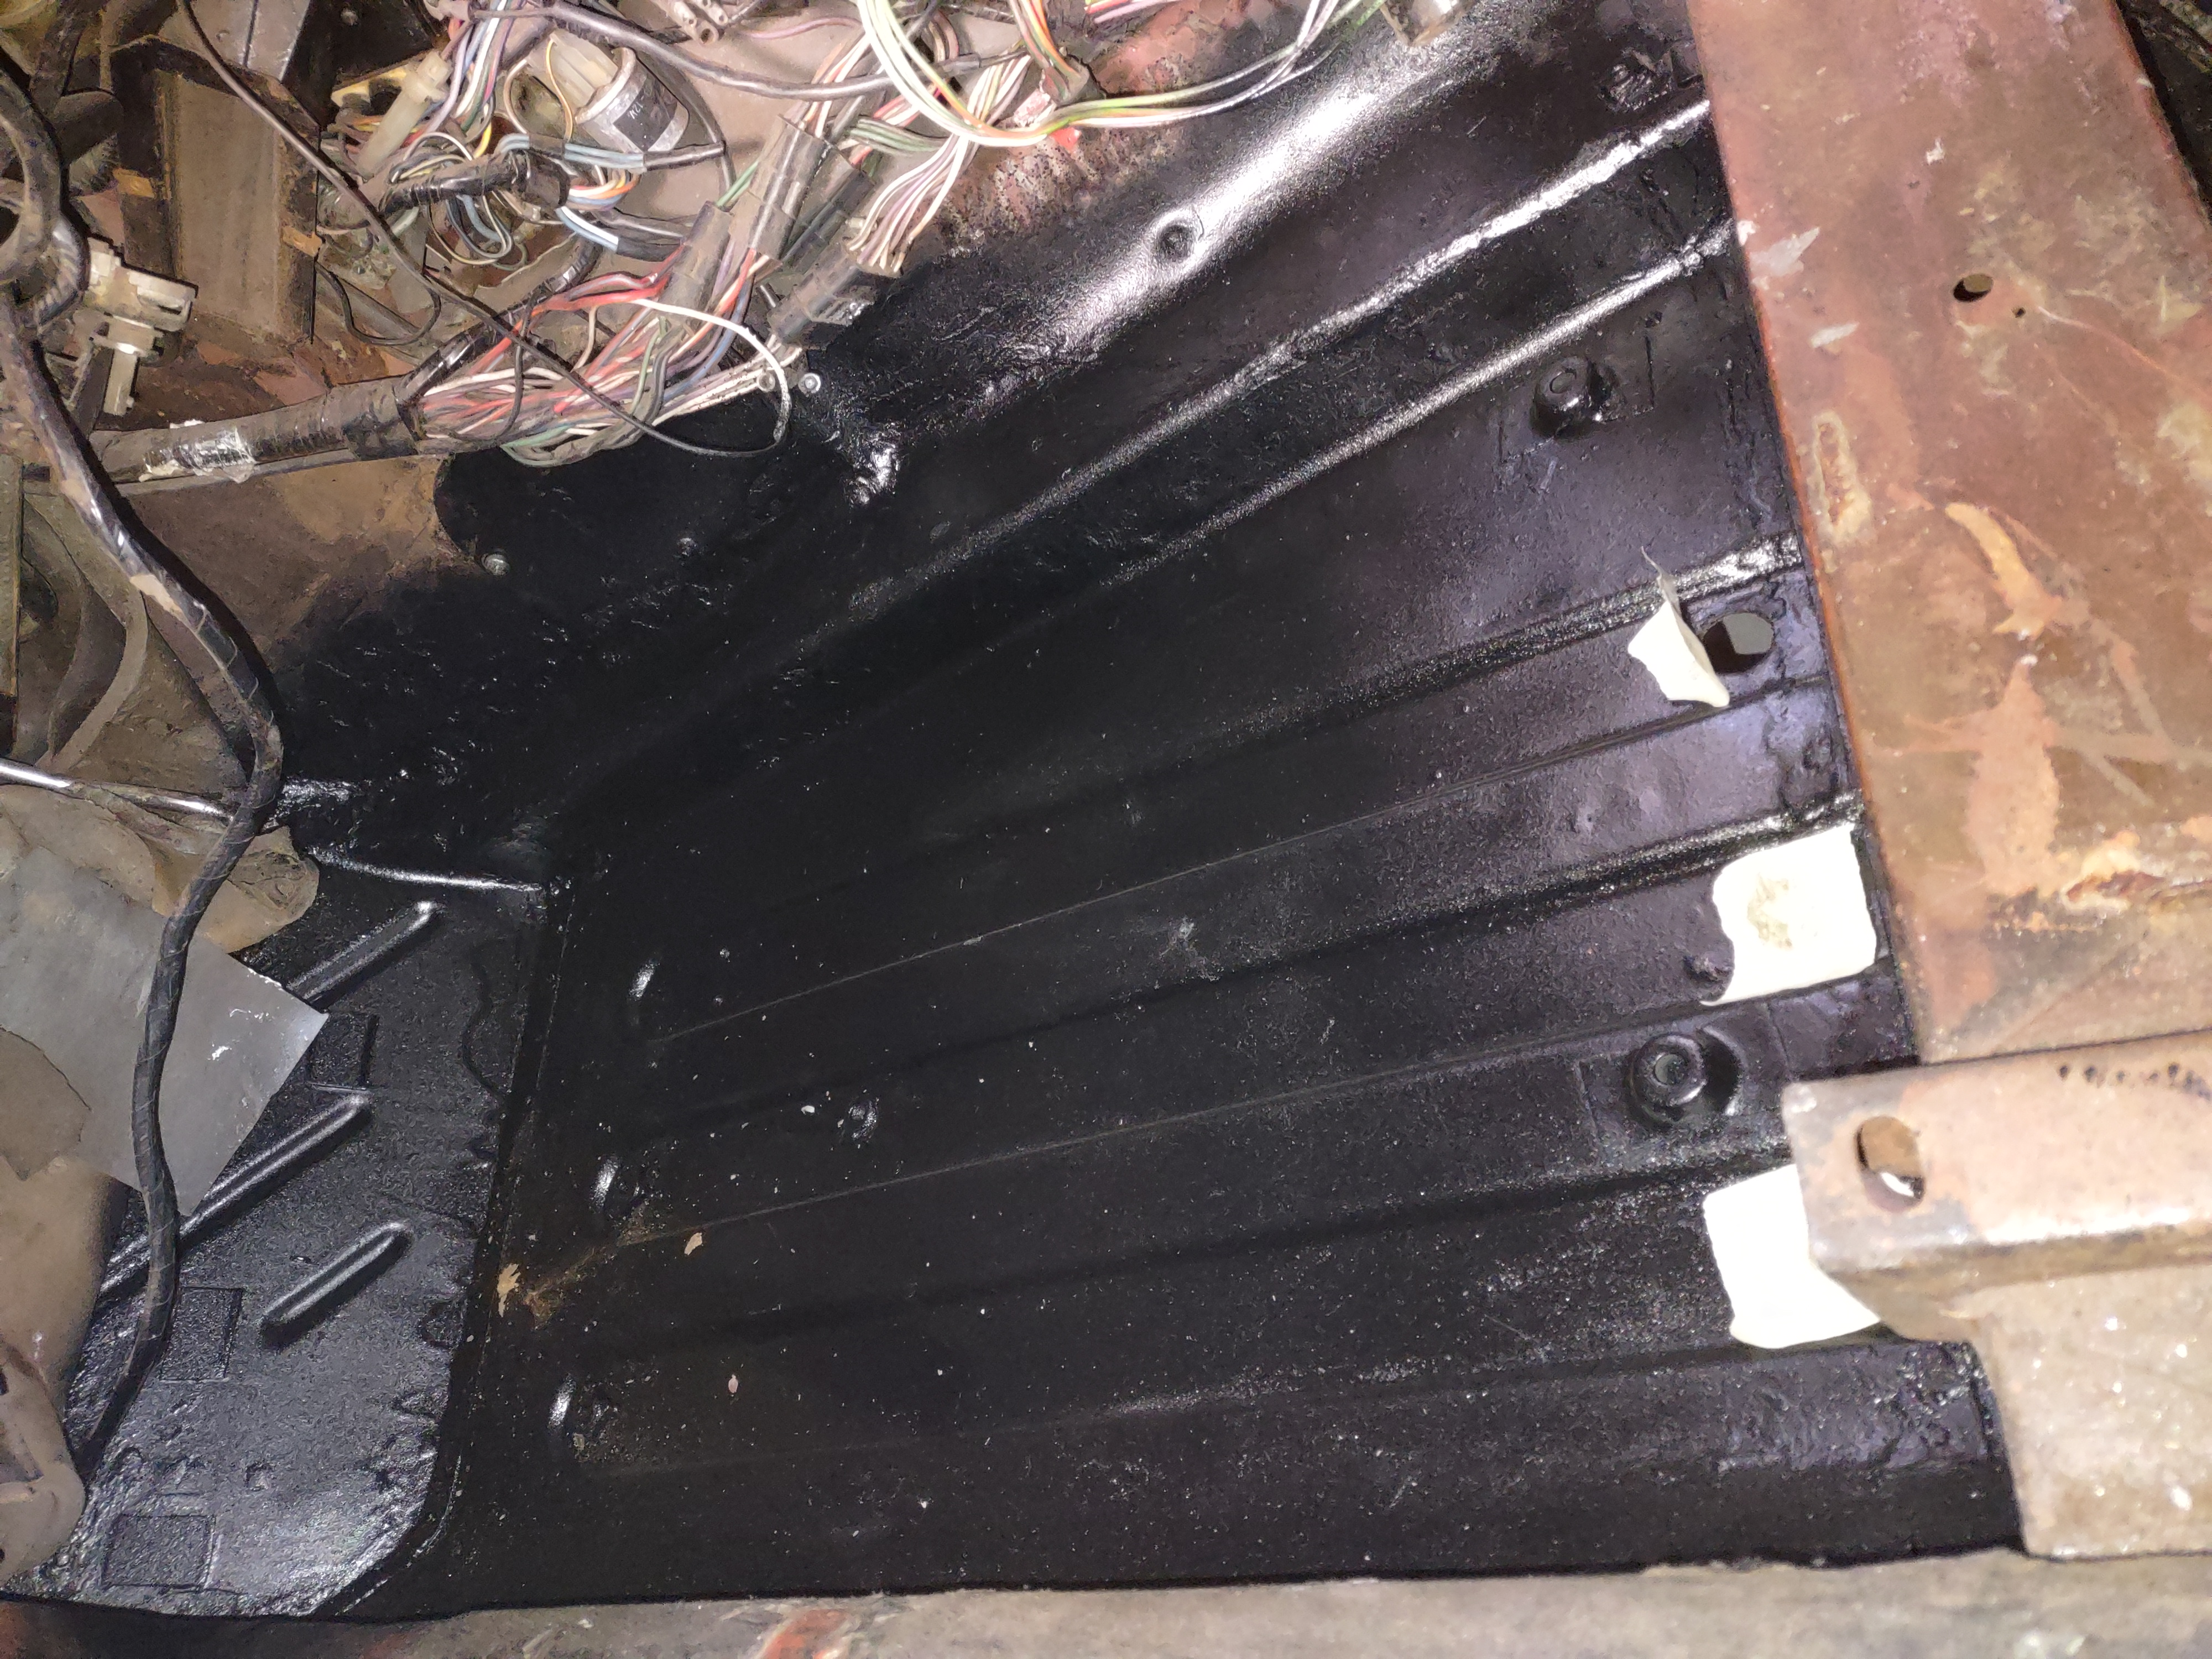
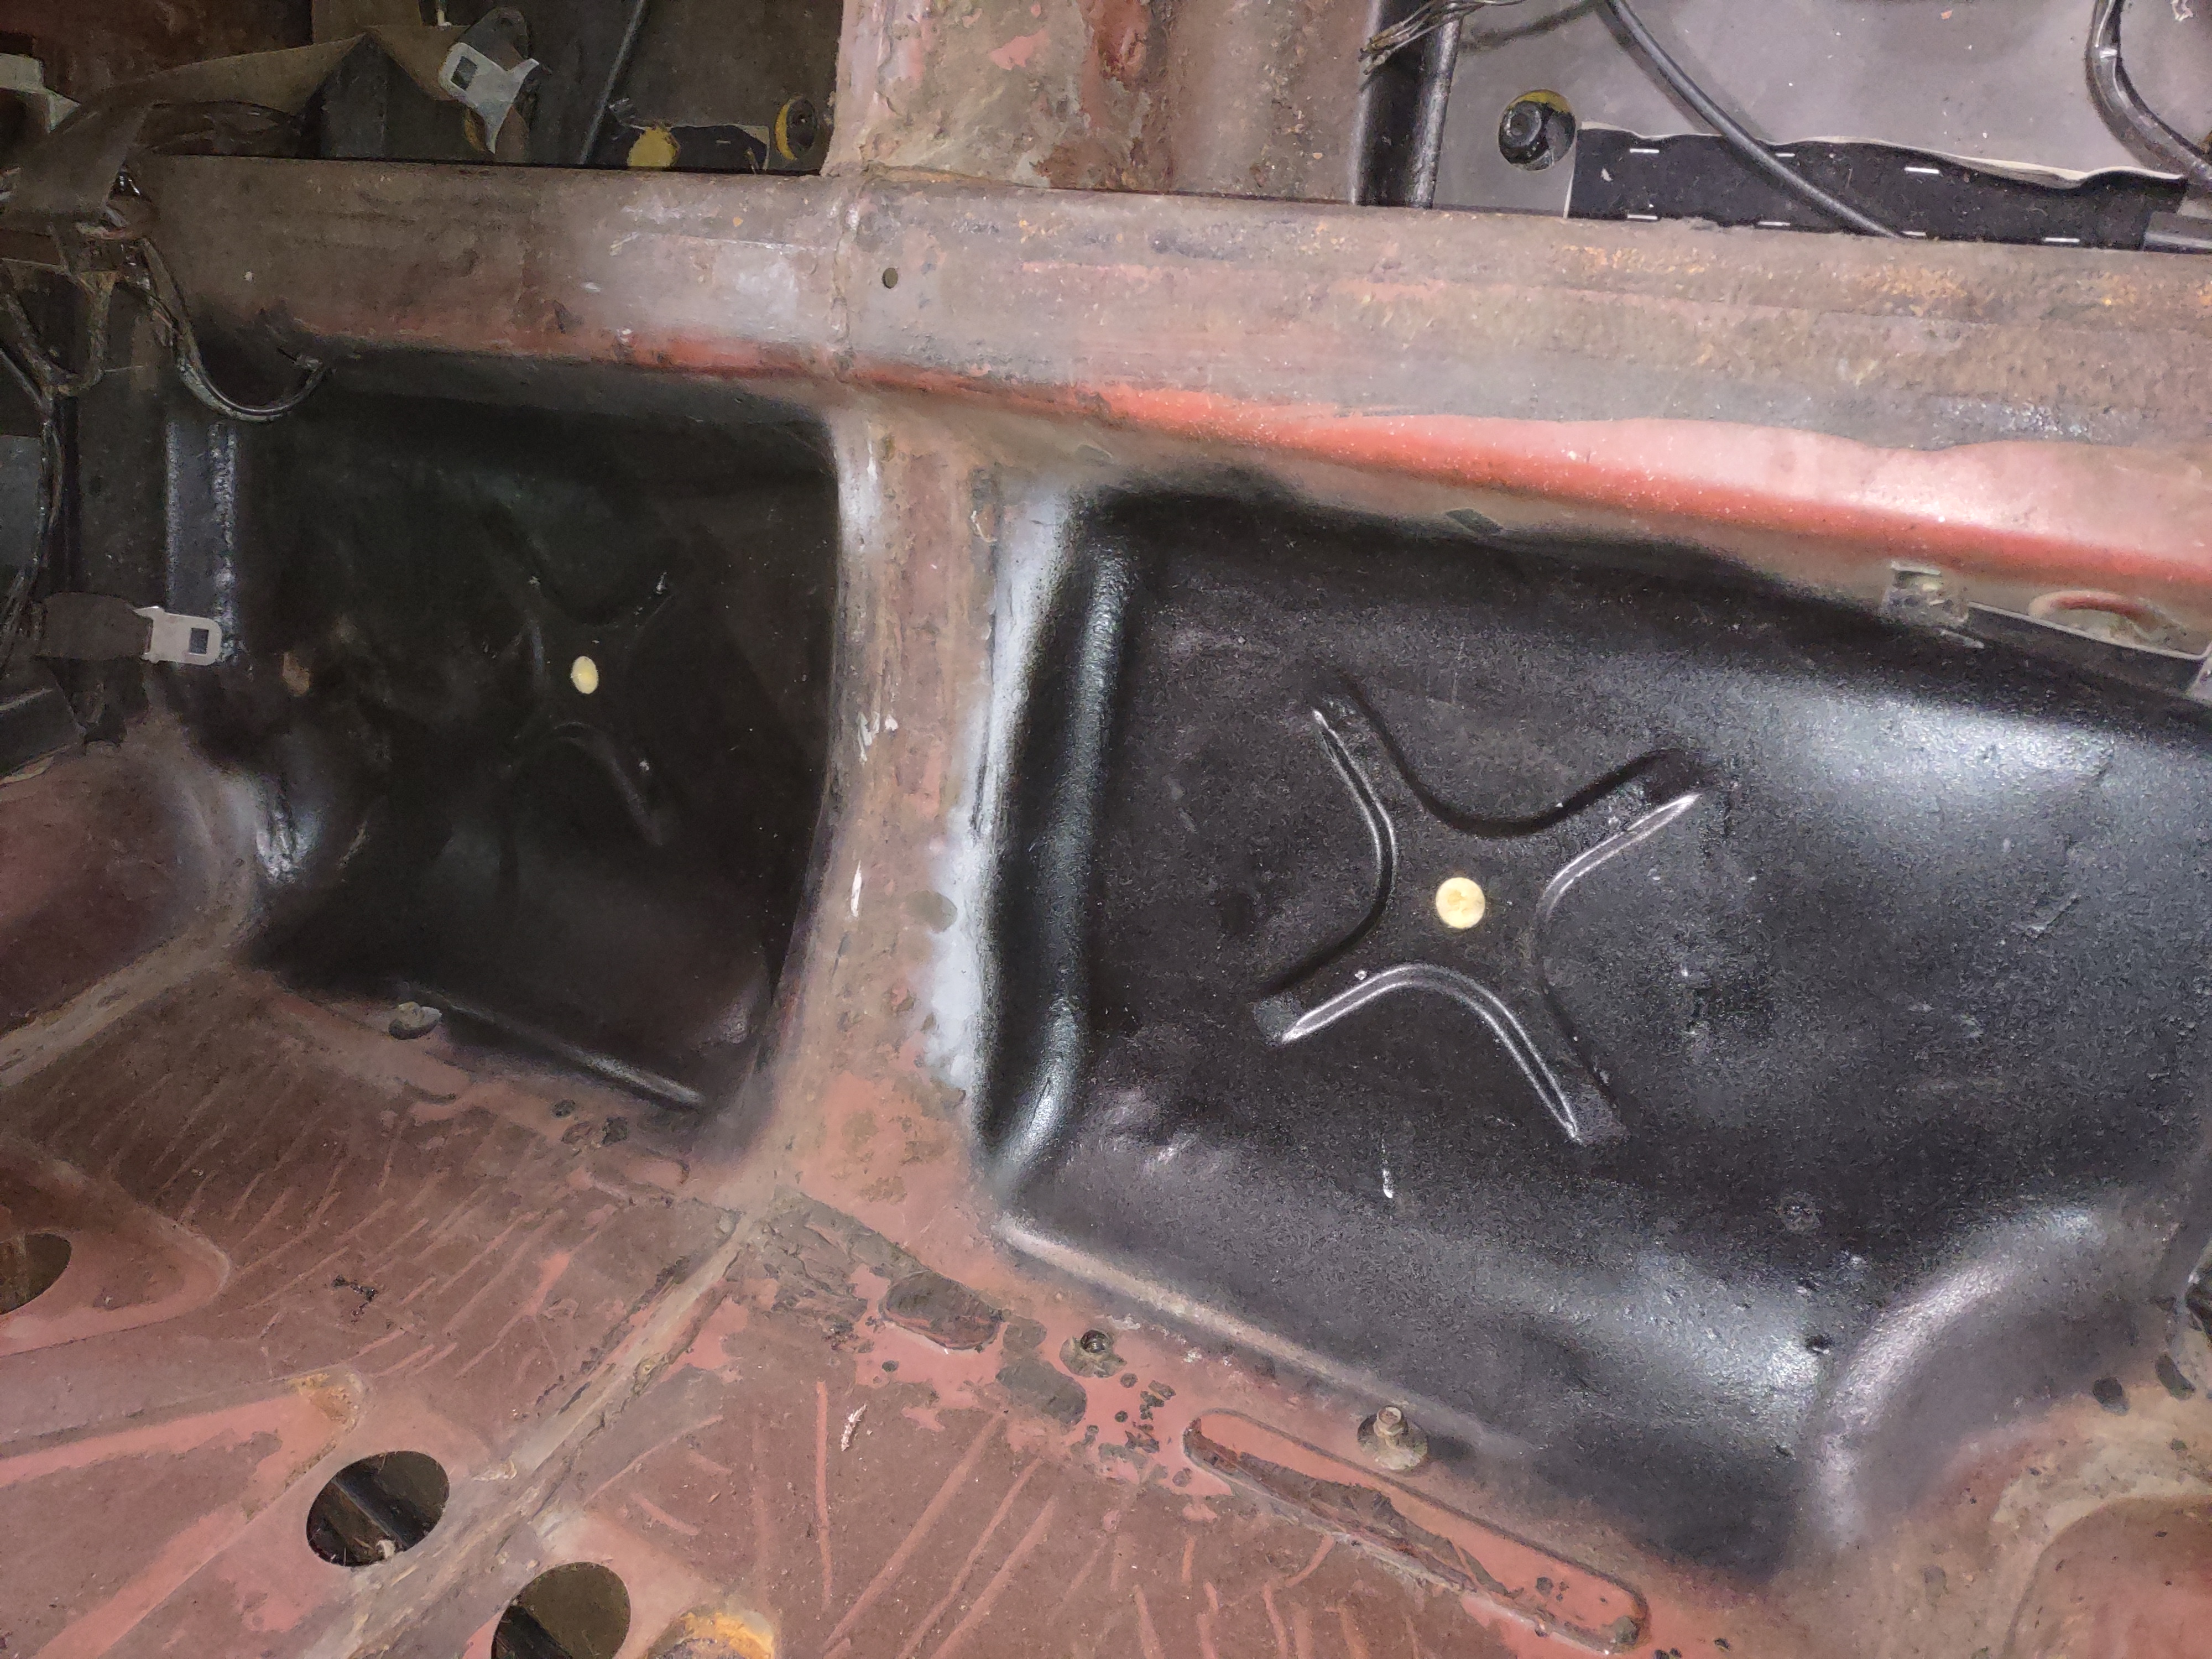
Don't be worried- we didn't throw away the rest. The black VDP also gave its great VDP interior to the project and there was much more saved from the others. From there the replacement pieces were installed and because they were OE Jag they matched perfectly. I was a little worried cutting out the damaged radiator support thinking I might find the right frame rail had moved. Luckily, the new support, which I stiched into the the existing front fender flanges lined up perfectly and almost welded itself right in. Here are some pics of the radiator support going in, a couple of the repaired floors repaired rear seat pan, and the repaired rear valence panel with the correct openings.
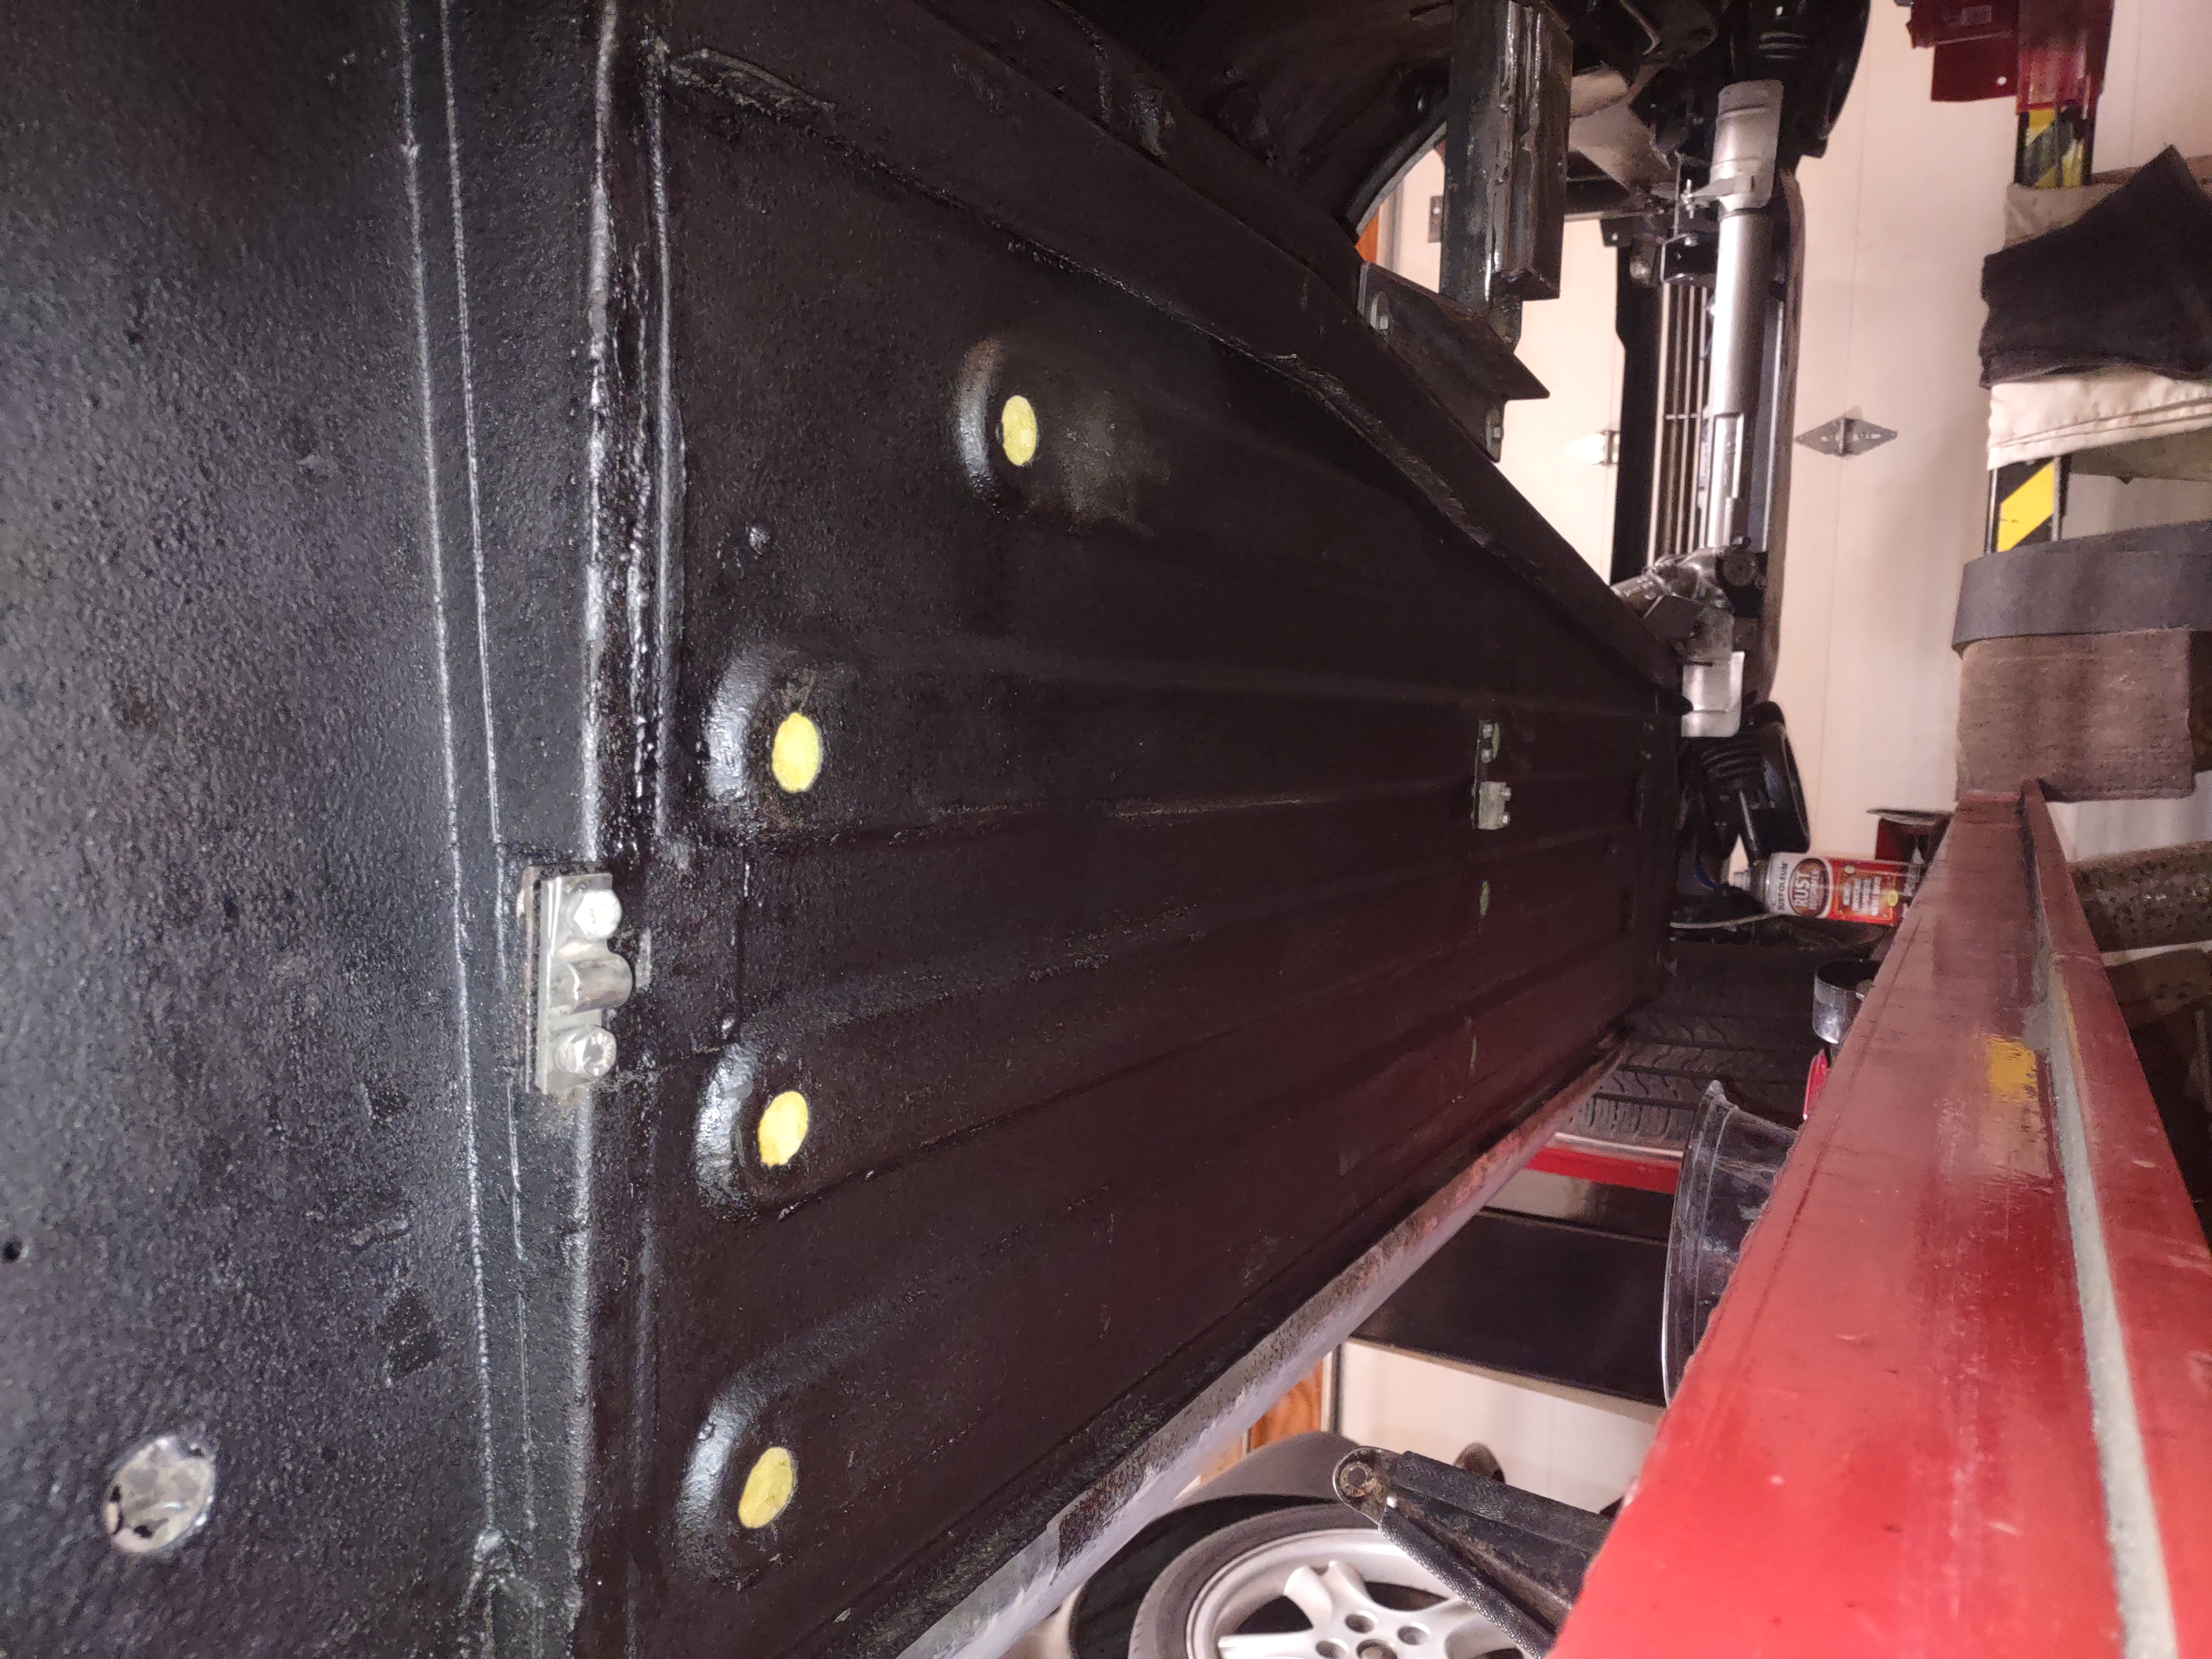
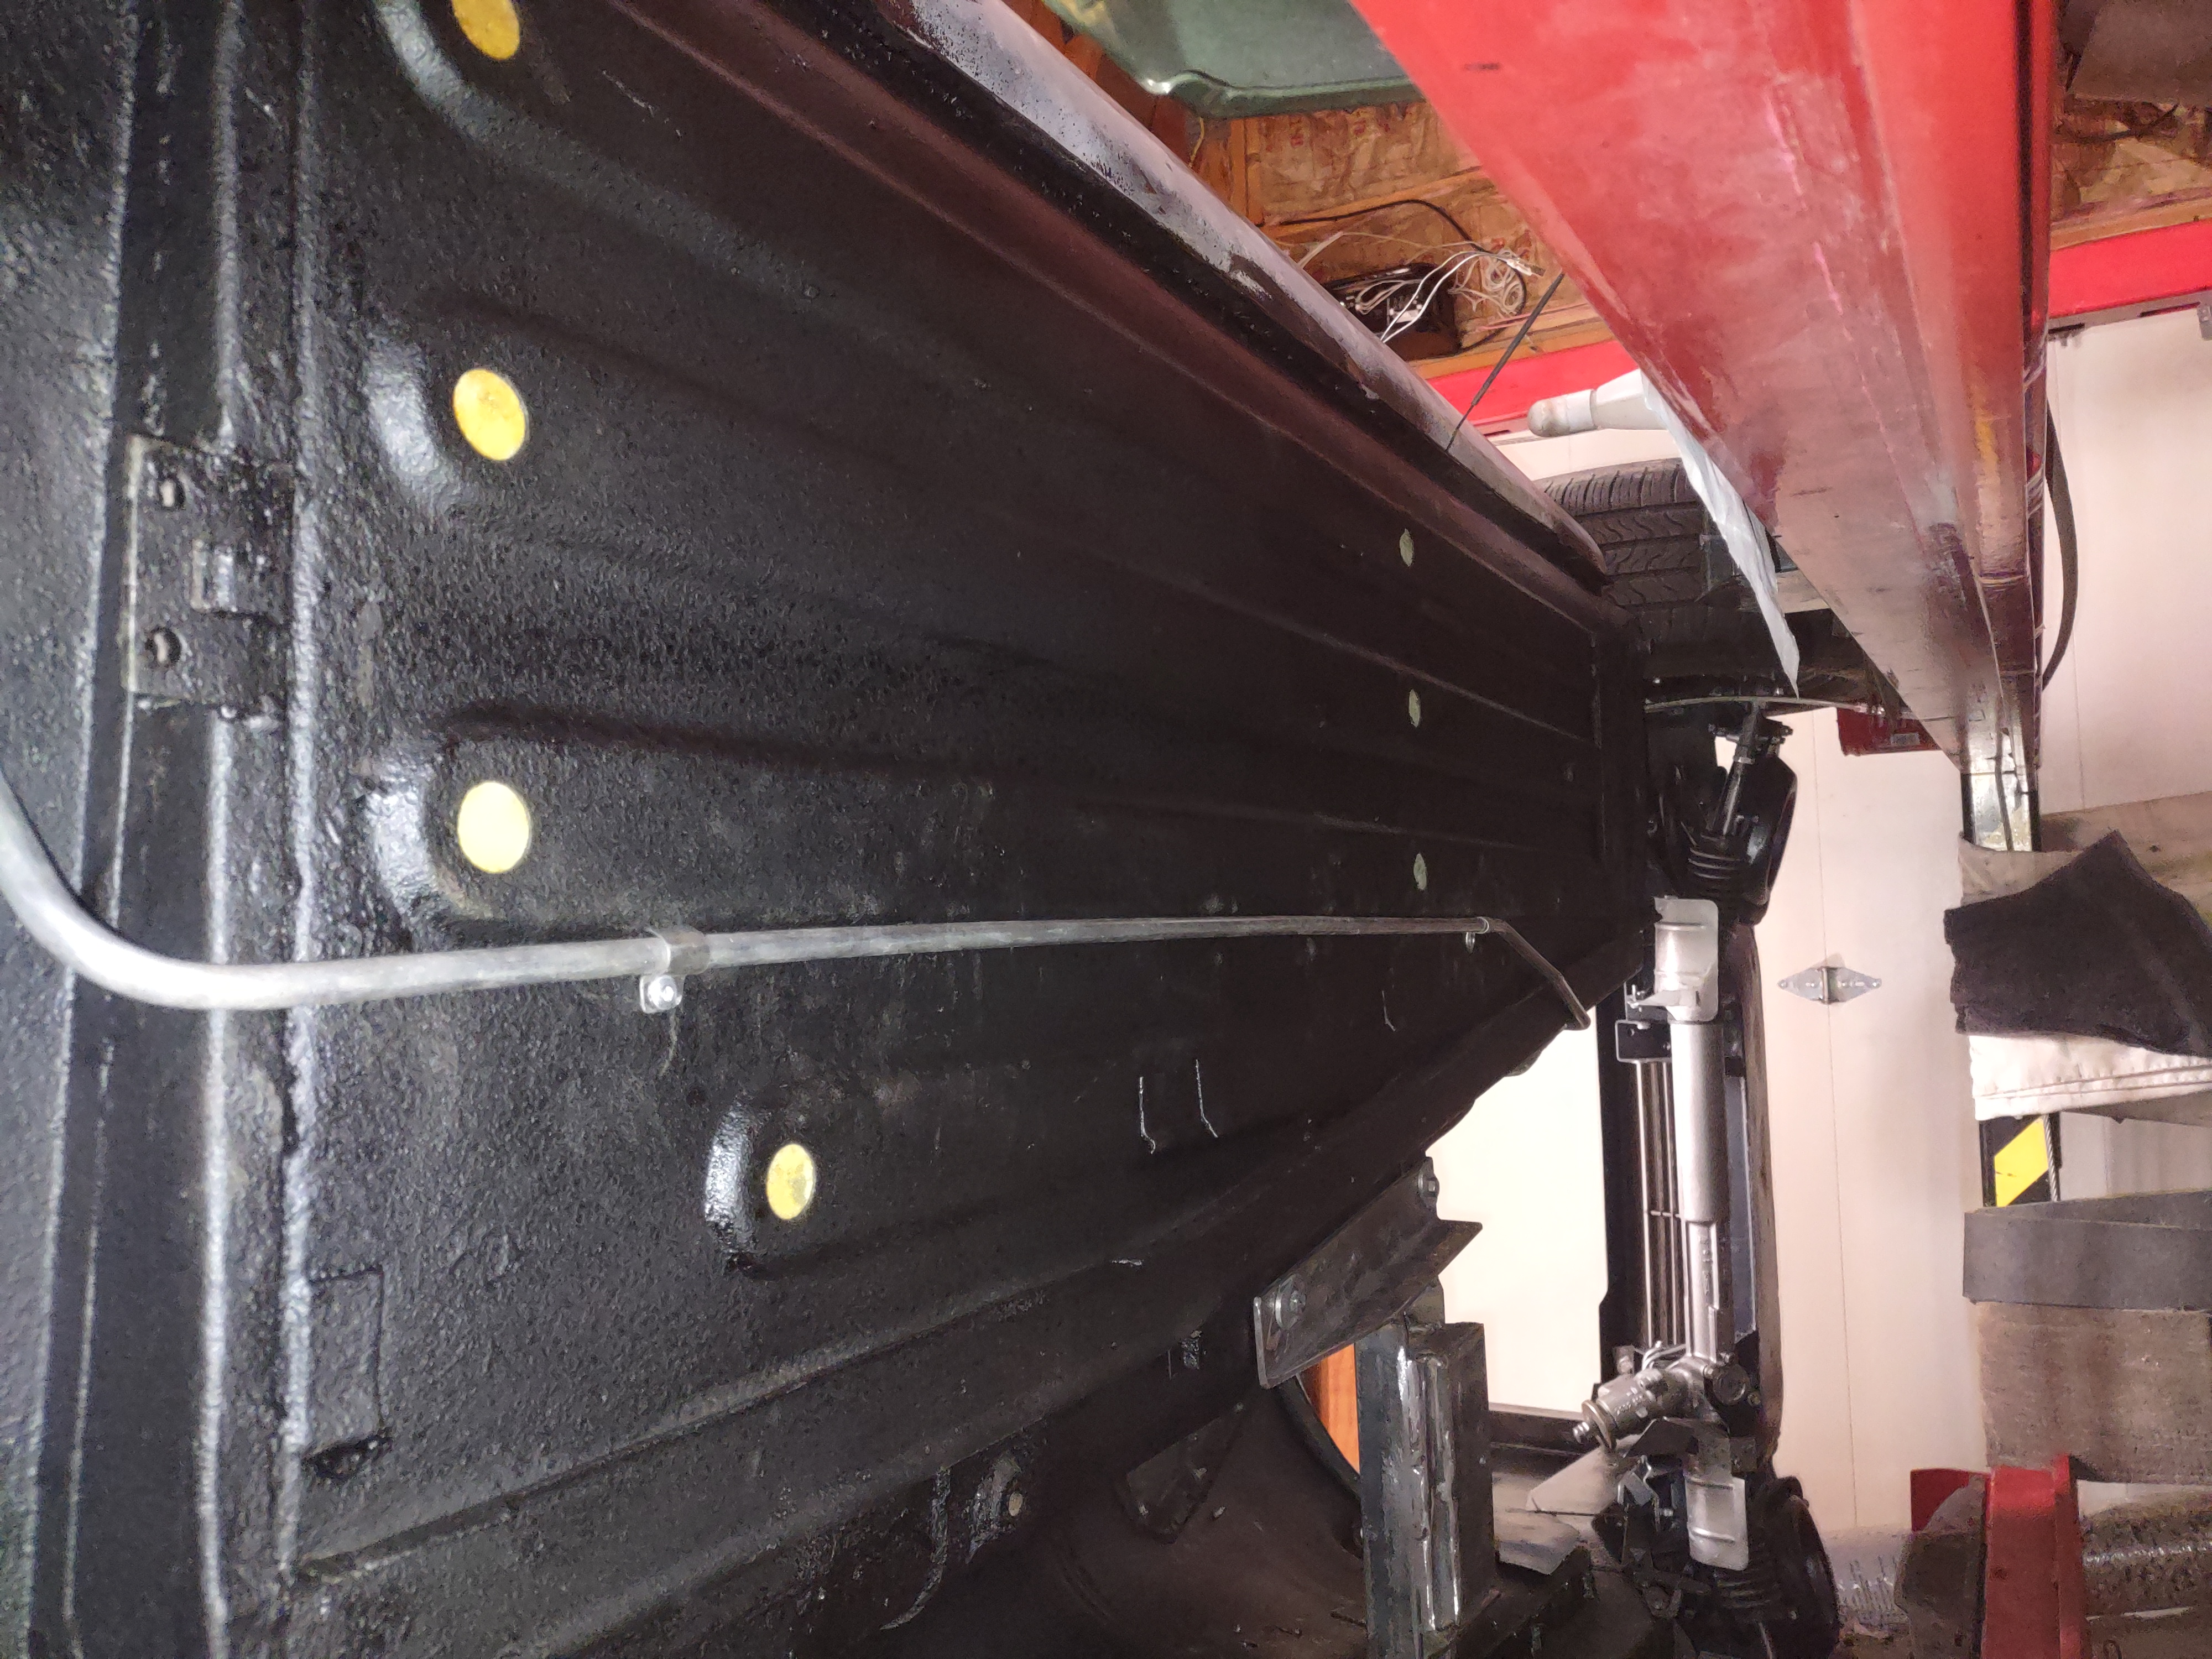
From there there was really any repairs to do on the body. What we did do is remove the front and rear sidelights and the small reflector just inboard of each tail light. Also, in the engine compartment all of the extra holes in the left and right fenderwells were filled in and the battery tray removed (the battery is going in the trunk). Because this car has the European bumper upgrade, a new set of European front turn signals were installed as well. Now we have a sound shell to work with. Just in case you're wondering, that black finish on the top side of the floors and rear seat pan is spray on truck bedliner. I wanted something tough and with a slightly textured finish and this fit the bill. Underneath, a new layer of quality 3M undercoating has made everything look just like it did when the car was fresh and new. The subtle texture of the undercoating (as long as it is sprayed on evenly) gives a nice finish and will protect the underside of the car for years to come. Coming next in Part 3: Major mechanical stuff and getting ready for the first fit of the LS2 engine and T56 manual trans.... Questions or comments?? Send me an Email: andrew@jaguarspecialties.com Talk to you soon, Andrew |