Telephone: 408-839-5569
Email: (Click Here) Andrew@JaguarSpecialties.com
Last Update 7-2-24
XJ6 and XJS LS Engine Conversions- LS1 LS2 LS3 LS6 LS7Note to readers: Kits are now available for LS engine conversions into 70-87 XJ6 (sedan and coupe) and 76-96 XJS cars. These articles are here to give you a flavor for what's involved in doing an LS engine conversion on your Jaguar, and I will be adding more on the different aspects of the projects from time to time. After driving my (finished) LS1-Jaguars for a while now, I can attest that the power, torque, flexibilty, and smooth reving of these engines are a perfect match these cars. This is a fantastic conversion opportunity any XJ6 or XJS, and with the information in our conversion manual, and the kit and supporting parts, a Jag owner could do this conversion on his own car easily. I hope you enjoy the different installments- please feel free to Email or call with questions, etc.,.
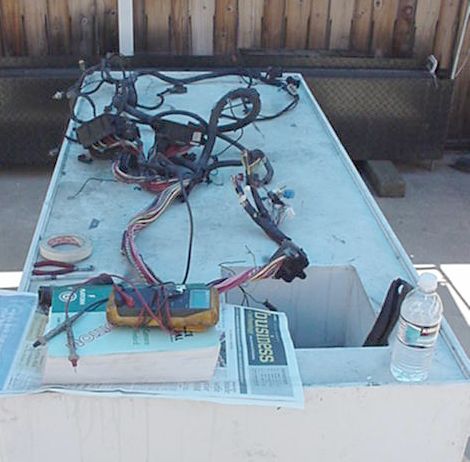
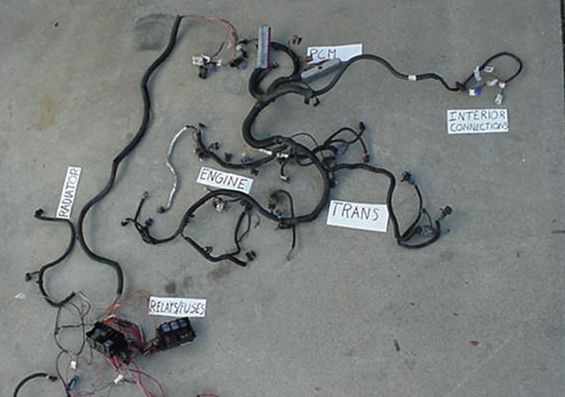
Part 3 Now that the major problem areas of oil pan and engine fit/mounting for the Jag LS1 swap have been solved, it’s time to look into the engine wiring and cooling system. Although all of the initial work done here was on the 89 XJS, nearly every element of it would also apply to the LS1 conversion I’m doing on the XJ6C (and then also any XJ6 sedan). LS1 Engine Wiring There are several different paths for an LS1 conversion owner to take to complete the engine wiring and get the car running. Aftermarket harnesses offer simplicity in that they are a “plug-and-play” option offering the end user a quick route to the end. All leads are tagged and a basic instruction manual helps the user complete the job. For me, the high initial cost of these harnesses, and the question of whether they are accepted in California as smog legal, leads again to using the OE GM wiring, and making the required modifications for use in the Jag. The overall format of the Camaro LS1 harness is very similar to what I saw in the Camaro LT1 wiring used on my XJSC LT1-6 speed conversion a few years back: nearly all of the engine wiring including relays/fuse block/power feeds are contained under the hood, with only a minimum amount of additional connections through the firewall to the rest of the car. In the case of this XJS, I’ll use both the LS1 engine harness (with connections to the LS1 PCM) and also the Camaro underhood wiring harness, which includes the above mentioned relay/fuse panel. That panel and the engine compartment harness also include wiring and connections for several additional GM systems we won’t be using in the Jag, such as headlights/sidelights/foglights, wipers/washer, ABS, cruise actuator, etc.,. The wiring for these systems is removed, and when finished the underhood harness size is actually about ˝ the size of what it was originally. The engine harness is left basically untouched- the only modifications there are the identification of the feeds to the rest of the car, such as VATS (anti-theft system) input, check engine light feed, park/neutral feed (from the shifter), tachometer and speedometer output, and wiring for the ALDL (diagnostic connector). Once the engine compartment harness had been slimmed down, I found the installation to be very simple, and the best part truly is this: should any problem or issue turn up, the factory shop manual wiring diagrams and repair flow charts will all apply to help diagnosis and repair. Attached are a few shots of the wiring work in process: the underhood harness initially laid out on a work table to be broken down (about 1/3 of what you see on this table will be gone when finished) and then a shot of the reworked underhood harness and engine harness laid out as it would be installed in the car.
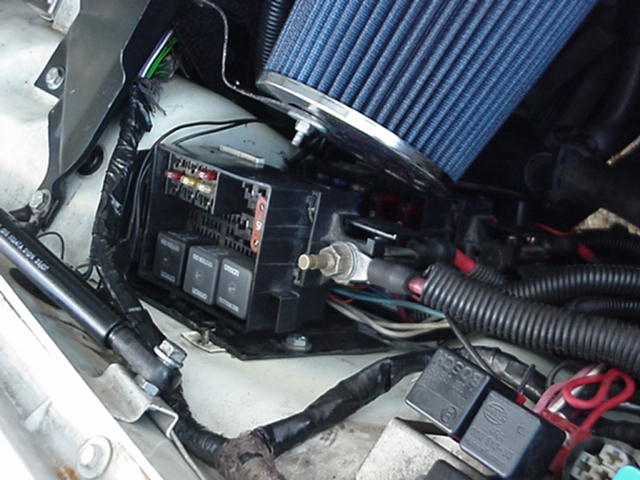
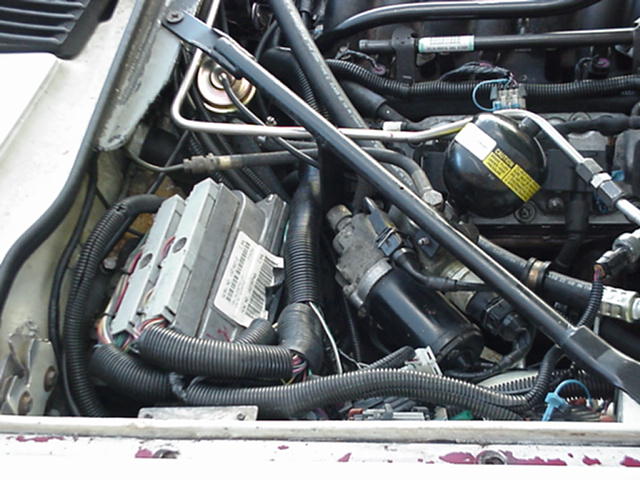
After the harness was reworked, it was ready to be installed. These next shots show the relay/fuse panels mounted in the left front of the engine compartment, the PCM mounted in the right rear. The (2) fuse and relay panels are mounted vertically along the inner fender well. Because this XJS was an 89 with ABS brakes, some minor repositioning of the brake pump hardware was required to mount the PCM in this right rear location. This extra work would not be required on 88 and earlier XJS (PCM would mount where washer bottle is originally), or 70-87 XJ6 (the PCM can be mounted in front of the battery).
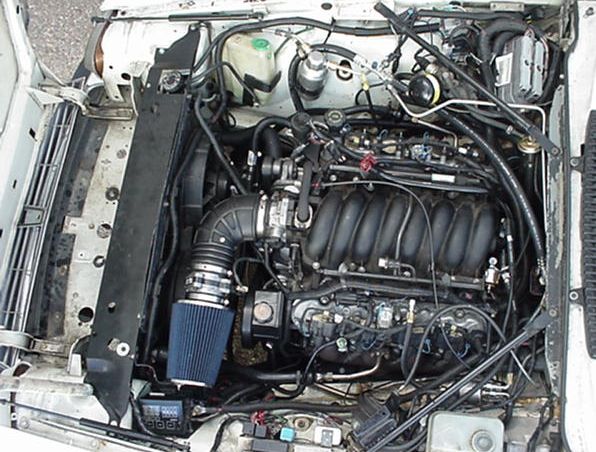
The last shot of this group is an overall view of the completed installation showing how well the Camaro wiring would fit an XJS (or XJ6) engine compartment. No major lengthening or shortening was required for the install, just some minor tweaks here and there.
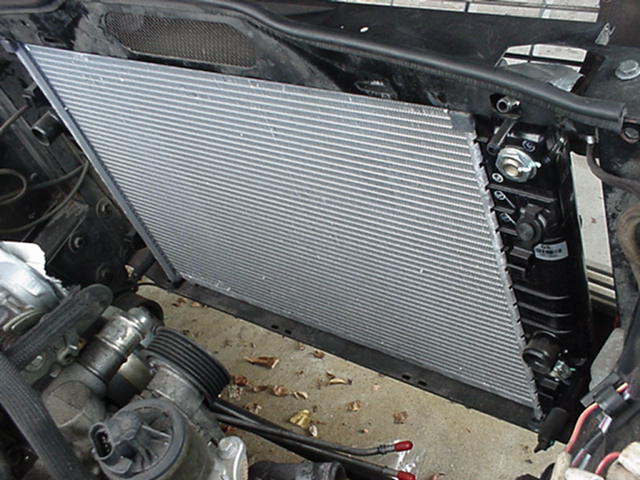
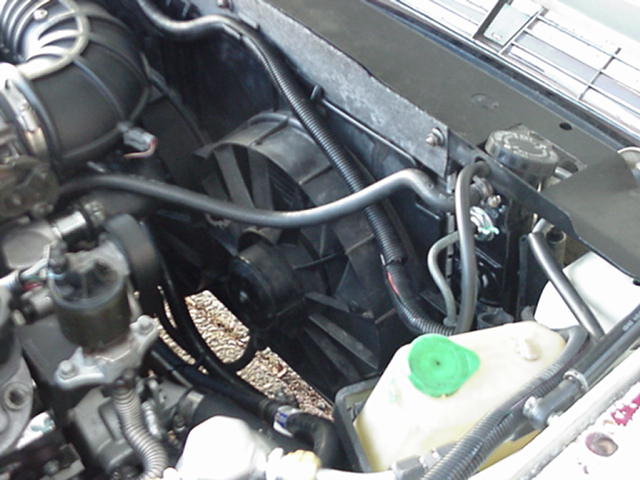
PCM programming- regarding the PCM, I am planning (on both cars) to use basically stock programming with no need for any extensive custom tuning. Instead of going for custom tunes, I prefer to use the Hypertech Power Programmer tools to make small programming adjustments. These units allow adjustment of cooling fan temperatures, axle ratio and tire sizes, shift firmness and shift points, and speed/rev limiter changes. Also, there is an option to install a “Power Tuning” program which although requiring premium fuel, makes good extra power, and is California approved and emissions legal. Lastly, should there be any issues down the road, the Power Programmer retains the PCM’s original programming which can be reinstalled at any time to return the PCM to stock form. This is a very handy feature should any extensive diagnostics be required in the future. Lastly, in regards to VATS (the stock GM vehicle anti-theft system) incorporated into the PCM, I leave that in place. That system does not allow the engine to start unless the PCM receives a specific signal from the car itself (via the body control module). To address this, I use one of my VATS bypass modules to provide that correct signal. This serves 2 purposes: 1) with the module operational, the engine will start, but also, 2) should the owner want to immobilize the car (as part of an alarm system, or even a basic kill switch), cutting power to that module makes engine start impossible. It’s a nice security feature that we get for free with the GM PCM’s stock programming. LS1 Cooling As before, the best approach for cooling is to find a properly sized, modern, off the shelf system that will also fit the car, And in this case that's exactly what we did. A complete package of radiator (with integral trans cooler) , twin electric cooling fans, and a matching modern parallel flow AC condenser was identified and test fit into the Jag. For both XJS and XJ6, all that was required was a 3”x 3” square opening cut in the radiator header plate for access to the LS1 radiator cap, and a ľ” hole drilled in the metal upright directly rearward of the opening for the radiator overflow tubing. Using standard GM-type rubber radiator saddles (glued to the underside of the header plate and the top side of the lower radiator support) the cooling package is sandwiched in between and the clamping force of tightening the header plate down holds everything in place. It’s quick, simple, and clean. The stock style GM aluminum/plastic radiators dissipate a lot of heat and are very reliable. In the Jag installations, both systems also use off-the-shelf molded radiator hoses for a better fit and appearance. And this has worked very well- the package cooled the LS well with no issues. Also, now using a modern, efficient, parallel flow AC condenser, the AC system will actually work well with R134a, something the original Jag condenser never did well, if at all... Hookups for the heater including the heater valve are pretty simple and incorporate standard off-the-shelf heater hoses (the local auto parts stores offer several pre-formed 90 degree and 180 degree angle 5/8” heater hoses of varying lengths that with trimming fit the Jag application perfectly). A standard, generic, vacuum operated heater valve fits and operates perfectly, and will easily outlast the corrosion-prone and leaky Jag original. The XJS install can even utilize some of the original stainless steel heater piping and hoses. Attached are some pics of the cooling systems: radiator alone mounted into the XJ6C (identical to XJS install), and the completed installation in the XJS.
Coming in Part 4- Exhaust system and power steering |